I love paper cut outs and wanted to try including them in my encaustic paintings because the wax holds paper so well. The first one went so well that I documented the process while making the second one, because I always like seeing how art is made and thought some of you would too. I used simple white paper from my sketchbook, traced my board on it, drew abstracted neurons on in the square, then cut them out with an exacto knife. . I did this a second time with another piece of paper so that I had two layers of neurons, but I had to be careful that I placed the bodies of the neurons in different spots on the paper so they wouldn’t overlap too much. Then I prepped my board with the background colors that I wanted, heated it again, and placed the first layer of cut outs on it.
 Then I fused them into the wax and painted over them a little to make them recede into the background.
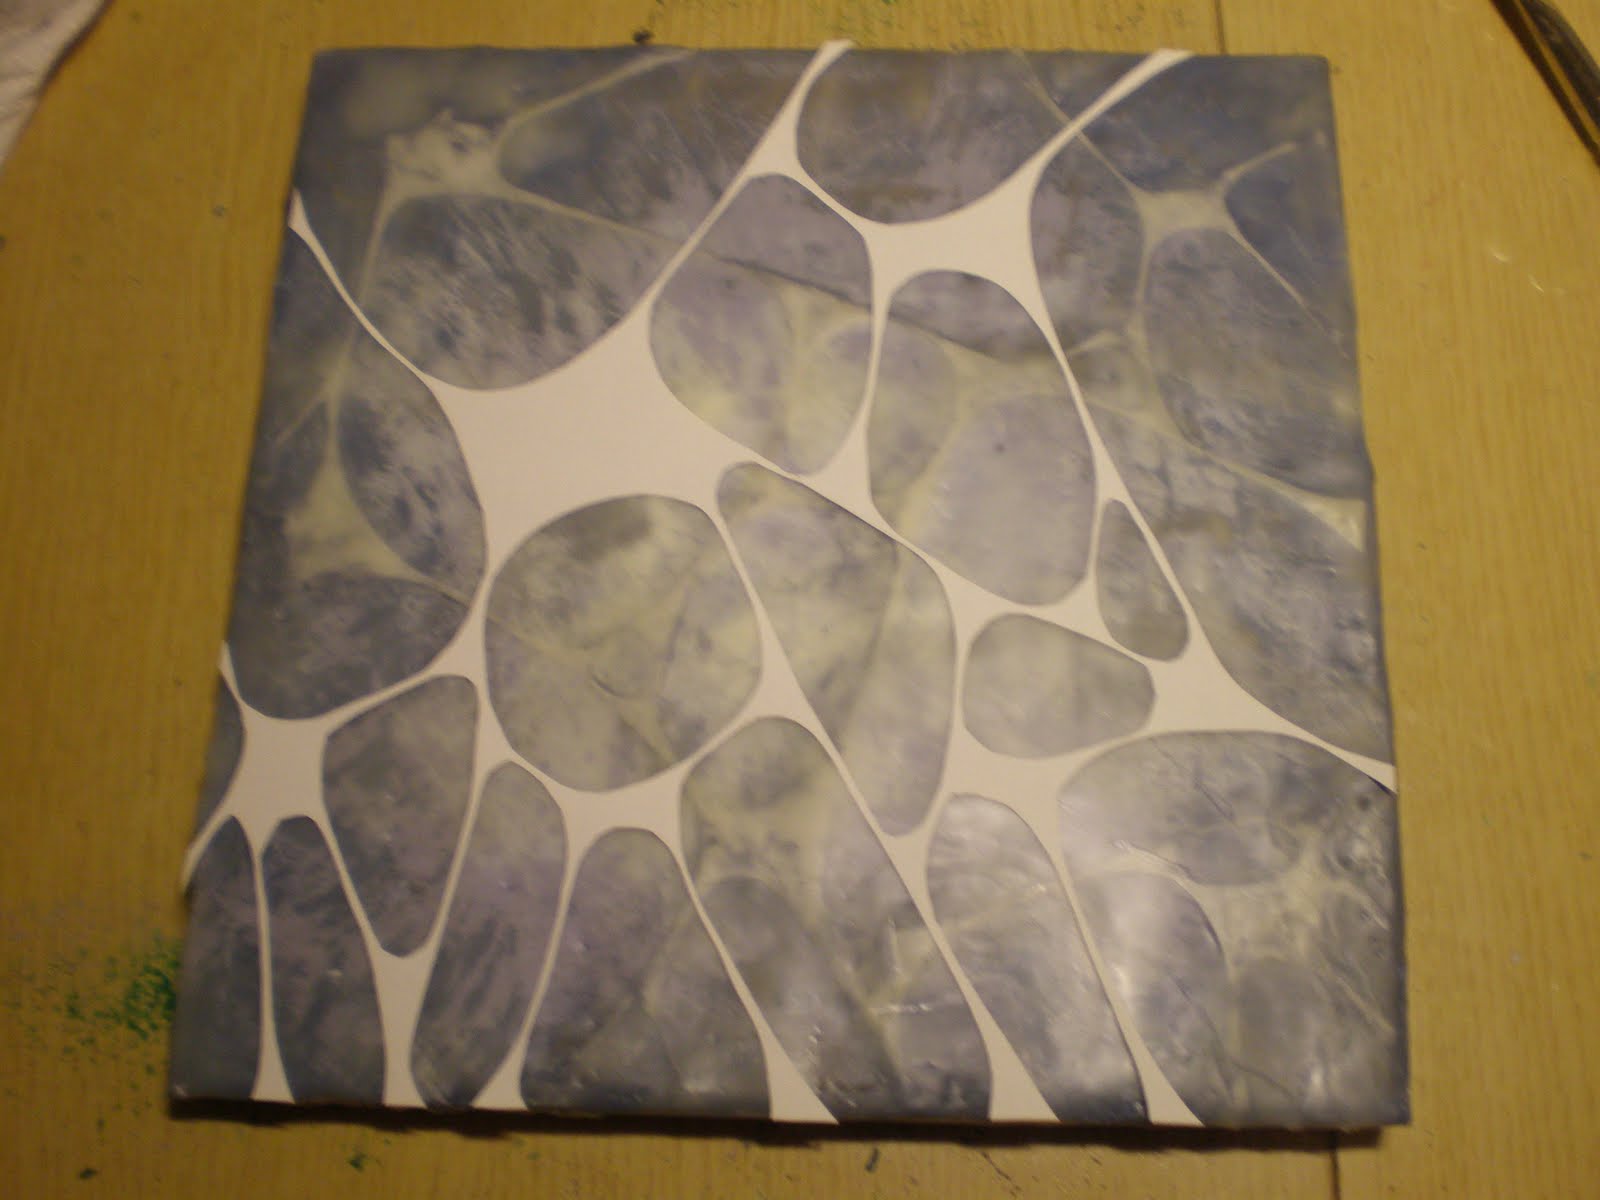
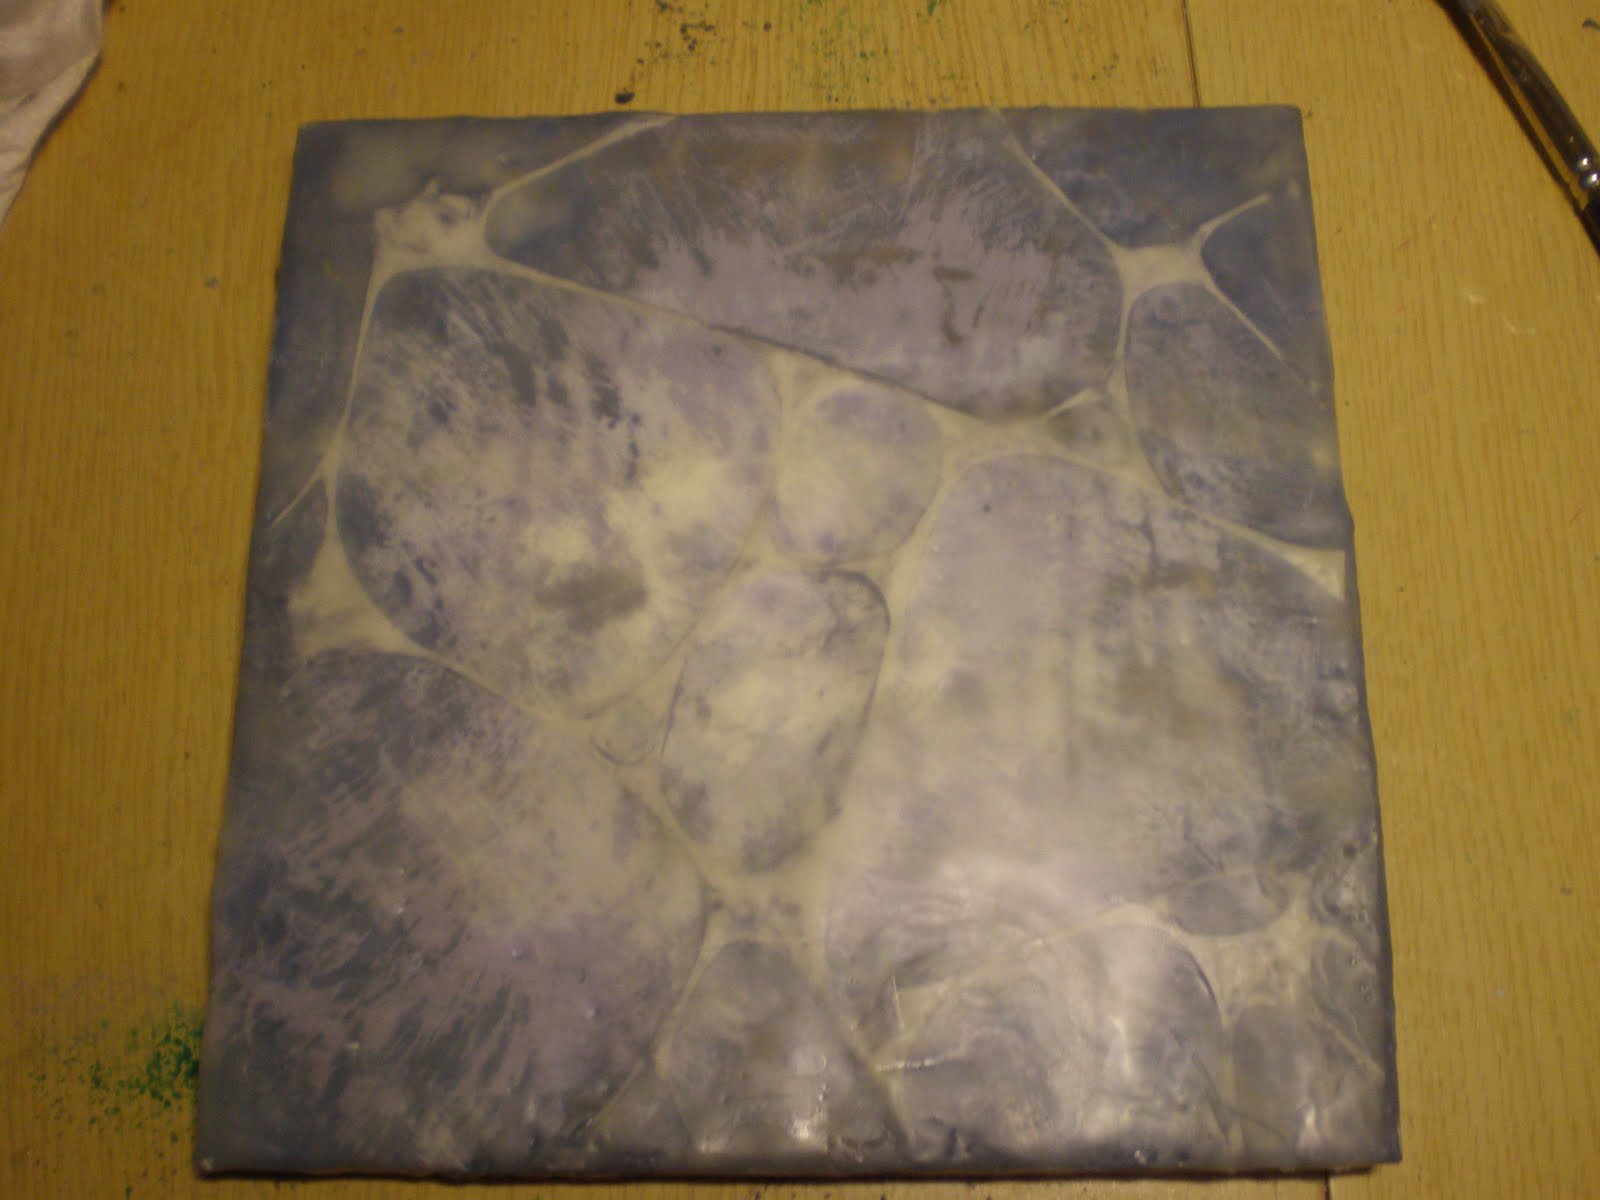 Next, I heated the board again, placed the second cut out on top and fused it into wax, and painted over it with mostly clear wax.
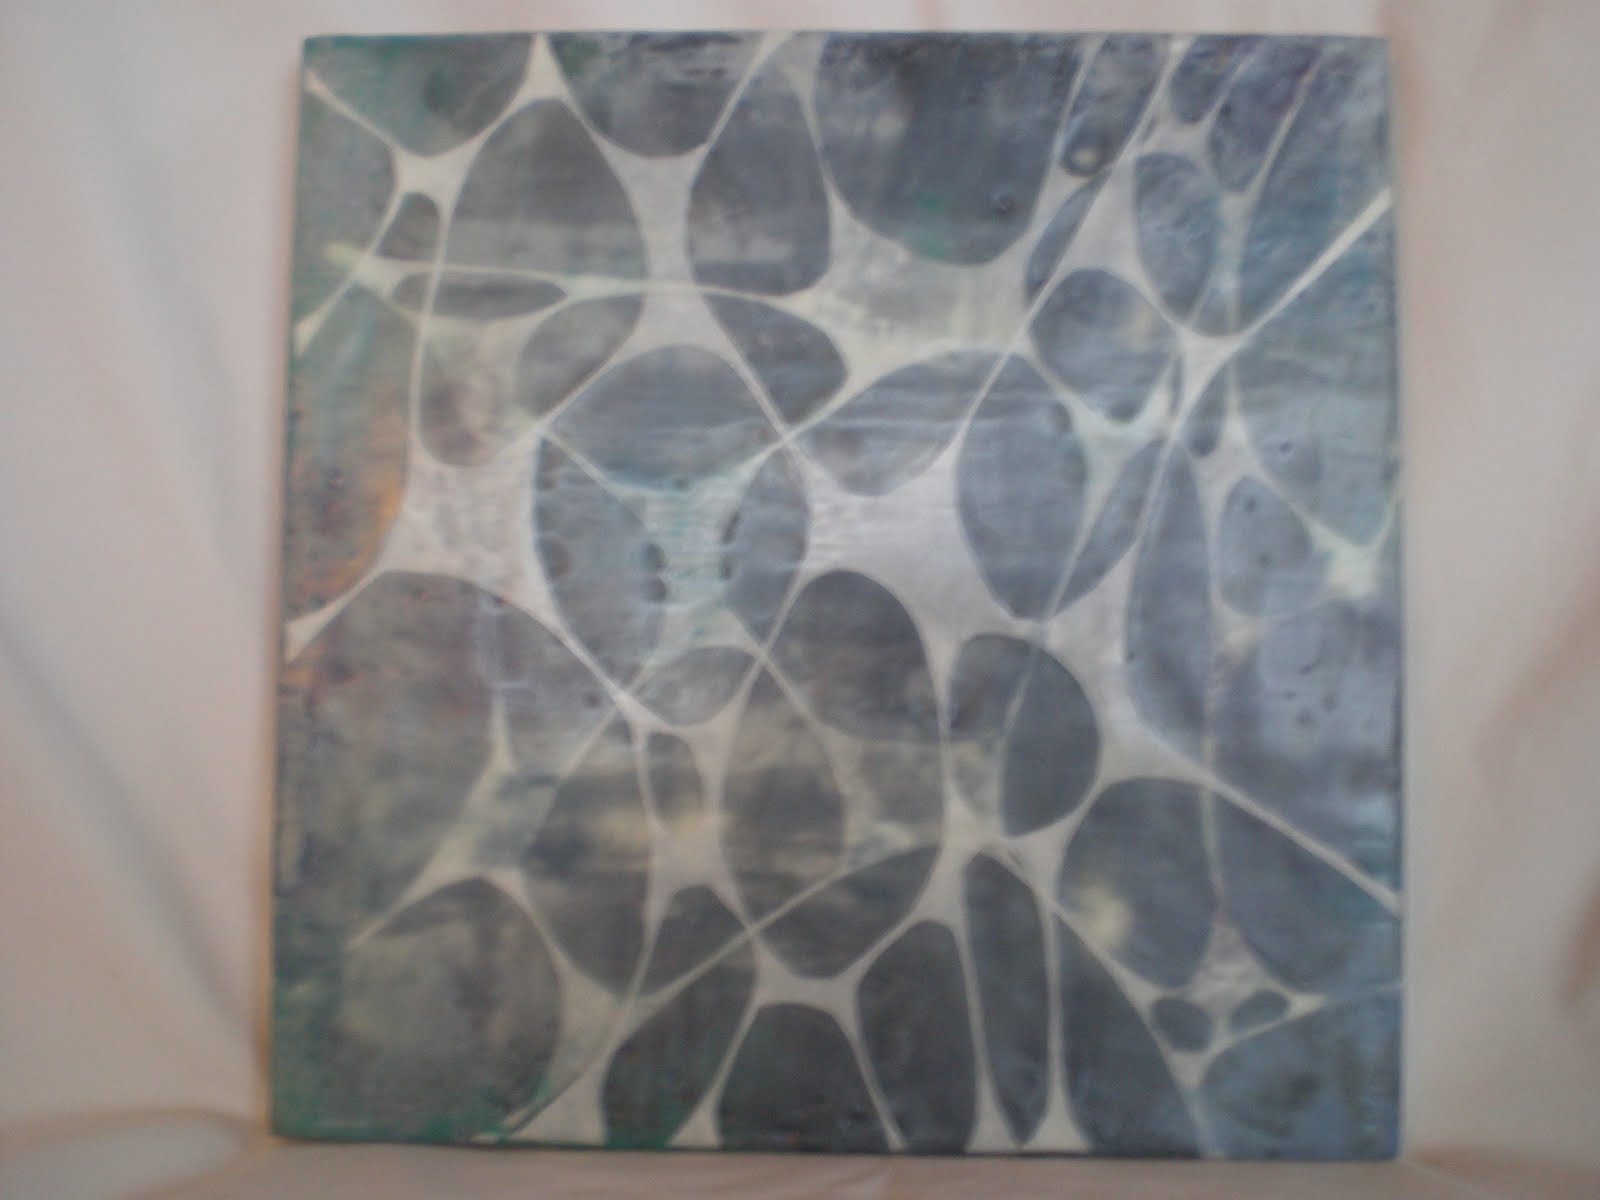
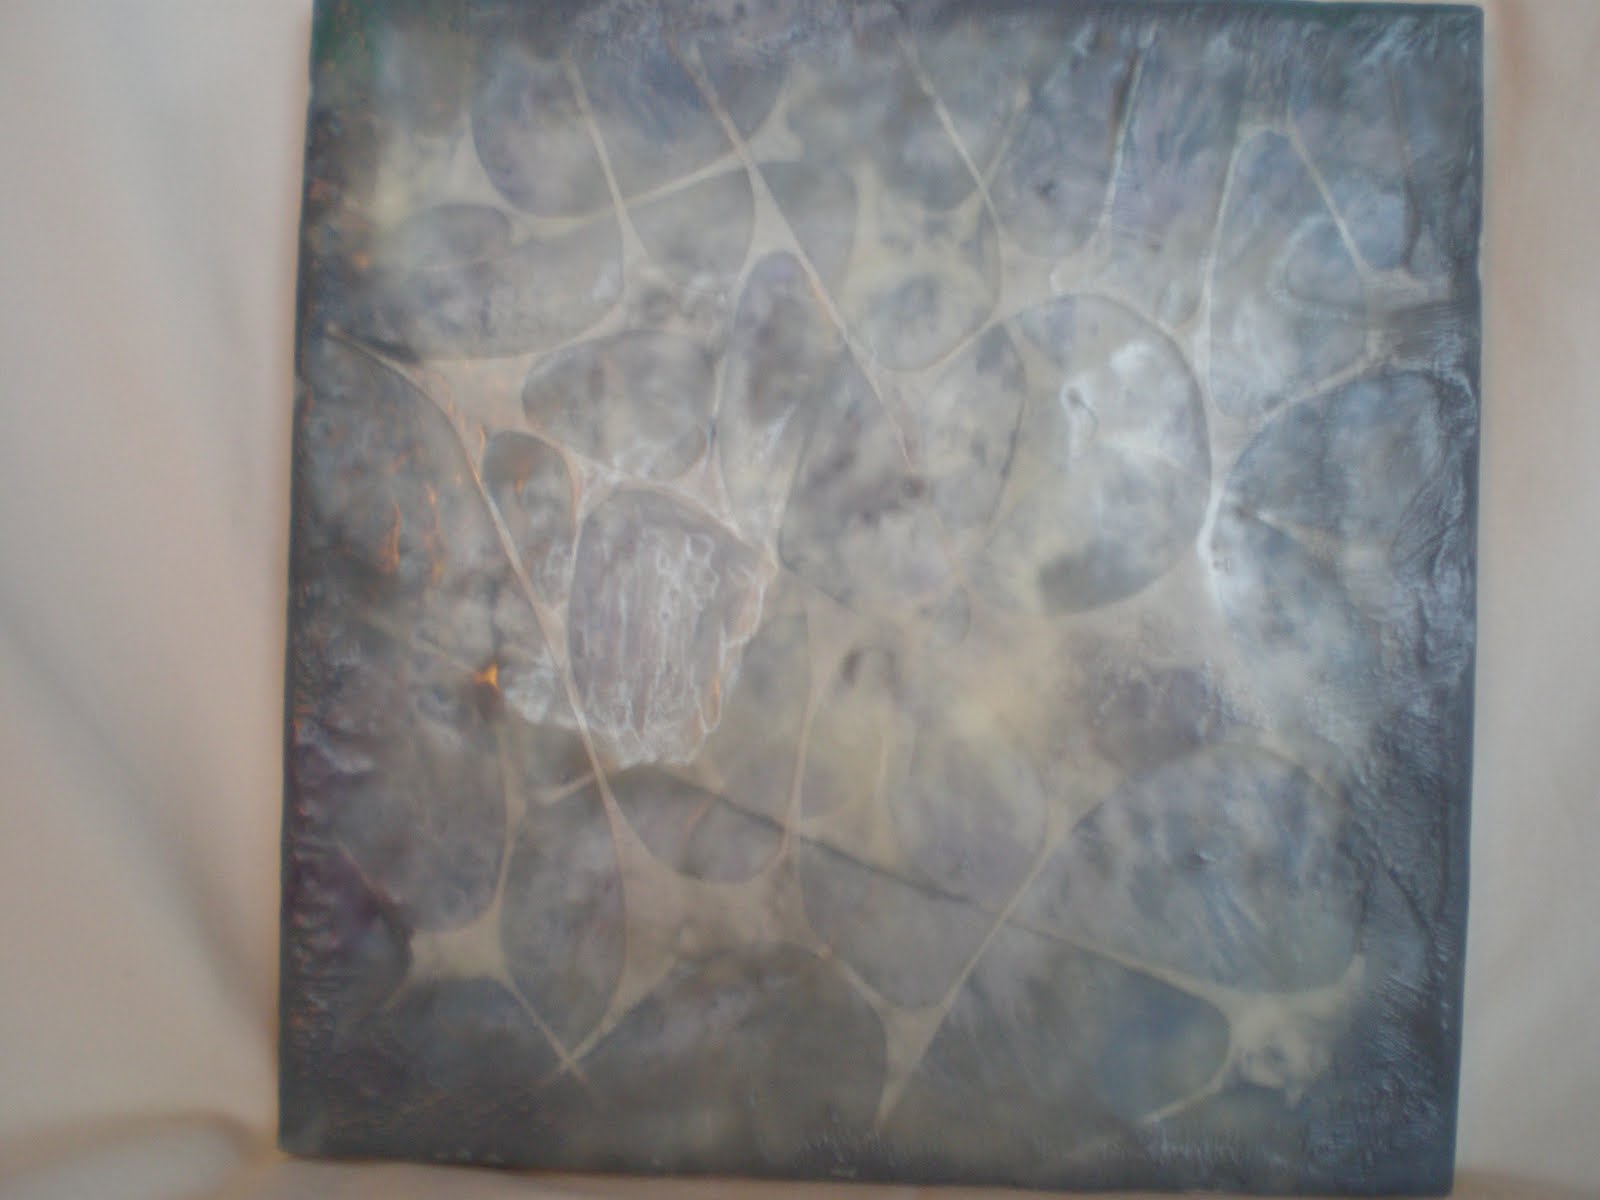
 Once the cut outs were all in the wax I painted the sides with a slightly darker color to hide the edges of the paper, fused it all again, and buffed the piece after it cooled. I actually like the first painting of cut outs I did better because they pop more on the dark background.Here is the finished painting, which looks different than the step by step ones because it turns out I painting it facing the wrong way! (the hardware I drilled into the back determines how it hangs)
 Here is the first paper cut out painting I did:
 Which one is your favorite? Any questions on the process or suggestions on how to improve these?Peace!
Paper Nerve Paintings – Step by Step
Slide Show of New Work
I just took much higher quality pictures of all my paintings yesterday and spent my evening and morning adjusting the color, brightness, contrast, and size of all the pictures. I hope to have a complete set printed today so that I can finally start putting together my portfolio and visiting the list of galleries that I’m interested in talking to. Feel free to take a look at my slide show and let me know what you think.Weeds and Pods Slide ShowPeace!
Piece for Love Show
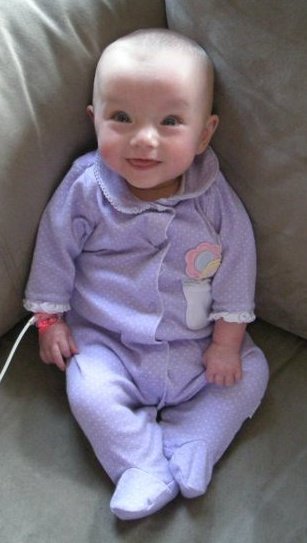
I created a new piece for the Portland Love Show this February and I wanted to share the special story behind it. Here is the painting which is titled “Prayer for Kendra”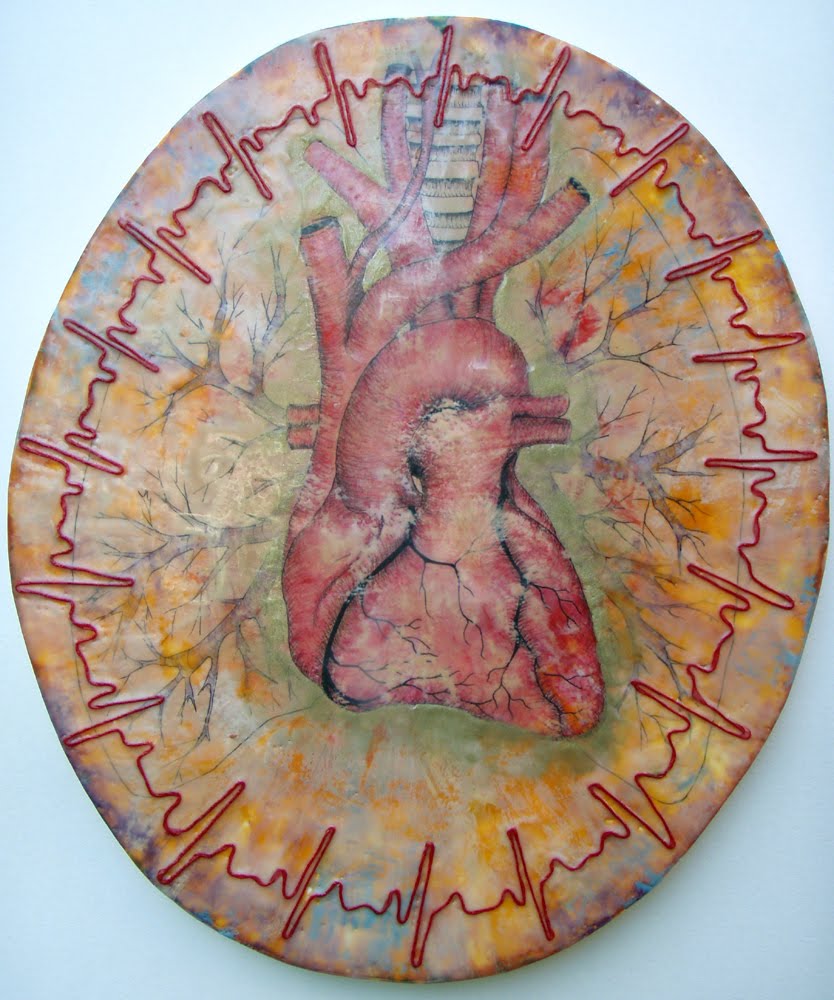 When I first signed up for the Portland Love Show I knew that I wanted to do a piece about my best friend’s daughter, Kendra. While my friend Melissa was taking a study course in Illinois for a med school test, her daughter Kendra was born at 24 weeks gestation. Melissa was told bluntly by the neonatal team that she had only a 25% chance of survival. Kendra was born 1 pound 6 ounces but to her mother’s and the doctors’ surprise, she kicked out and cried on her own upon entering the world. She had a fighting spirit! At that moment, Melissa knew she had to have the doctors try to save her.
 While Melissa was in Illinois she would send email updates about Kendra’s health, and ask for people to concentrate their prayers/positive thoughts/healing energy on what Kendra was struggling with the most at the time, which were usually her heart and lungs. While I was knitting her baby blanket I would picture her heart and lungs complete, strong, and healthy. I would send her my love and positive thoughts everyday, as would all of Melissa’s friends and family. The first thing I thought of when presented with the topic for the show was how strong Melissa’s love is for her daughter and how it was such a strange and powerful kind of love we all felt for a person that we’d never met. I wanted the center of the painting to be the heart and lungs I visualized, and I included thread in the pattern of a heartbeat to represent the yarn from the blanket I was knitting while I prayed for her. I wanted the whole image to be a take off of the sacred heart image in religious paintings, because the piece was basically a visual prayer for her health.Kendra came home in September, and while she is still fragile and struggles with health complications, she is doing incredibly well and is a beautiful and happy baby. Her family still struggles with finances though, because of Kendra’s hospital bills and Melissa having to take time off of medical school. I’m writing this blog post partially to tell the story behind the painting, and partially to bring awareness to this young family’s situation. If my painting is sold I’m going to give half the profit to Kendra’s family because while I don’t have money it’s a small way I can help. If anyone else wants to help them financially an account has been set up with Wells Fargo under Kendra Kjos’s name. Just walk into any Wells Fargo bank and give them the name “Kendra Kjos” and you can donate to her trust fund. Any amount helps, and if people chip in just a little bit it can add up over time. I hope to see some of you at the Portland Love Show!Peace!
Portland Love Show
Loyal family and friends who actually check this blog (and any other people who have stumbled across it) I’m in another show next month! I will have a piece in the big crazy Portland Love Show with over 300 other artists. I’m creating a brand new painting for it and have had some trouble getting started due to complications with the board I wanted to use, but things are moving along now. I want to keep the painting a surprise until the opening of the show, but there is a story behind it which I’ll post about after the show opens. I’ll be there opening night, so I hope to see some of you there. Portland Love Show:
Saturday, February 12th, 20117pm-12am
Gallery Homeland2505 Southeast 11th Avenue #136,Portland, OR 97202
New Paintings
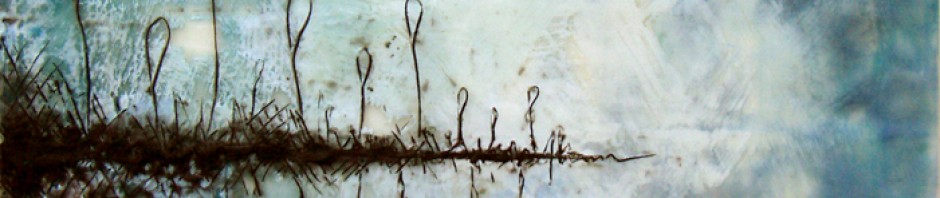
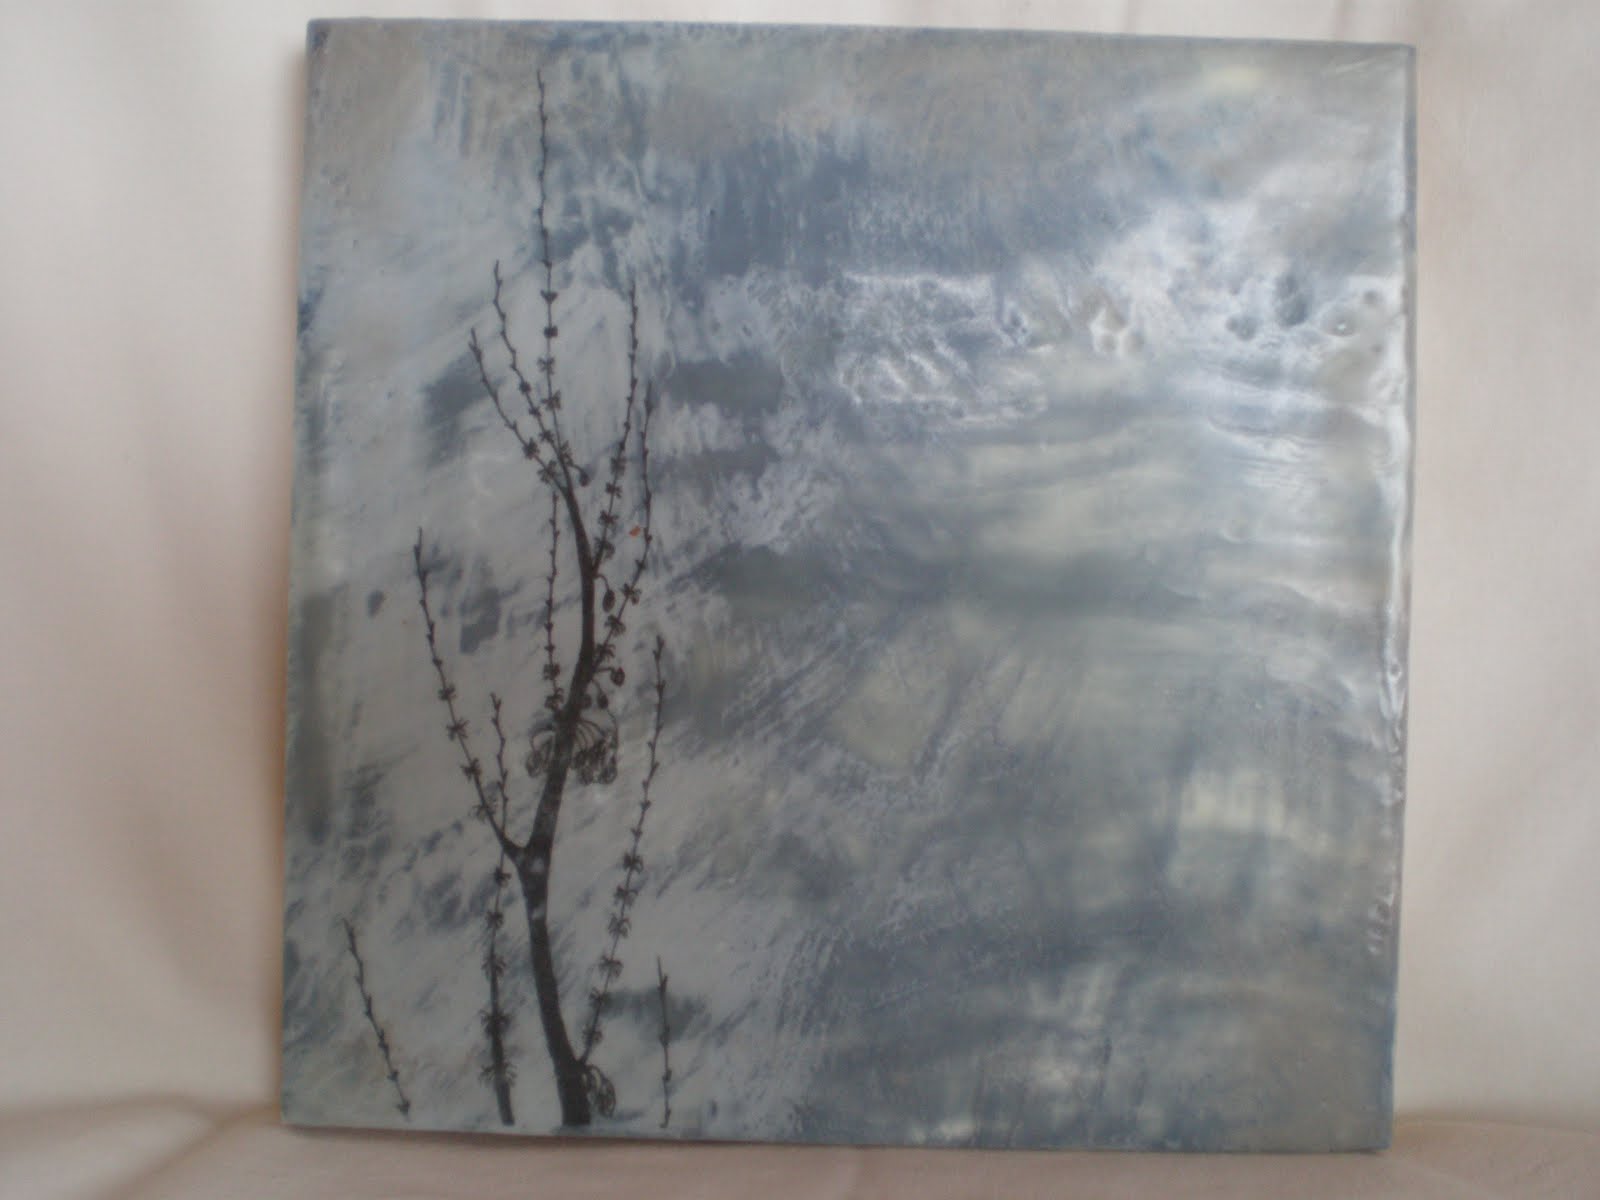
Since my last post was so information heavy I thought I’d give you guys some pictures this time 🙂 I’m about halfway through a series of encaustic paintings based on weeds and seed pods and thought I’d share what I’ve done so far. I’m working on three different sizes of boards, 10 x 10, 8 x 8, and 6 x 6. Be warned that these aren’t the best pictures because my camera sucks and I’ll take better pictures of everything for my portfolio when I’m totally finished with this series (I want about 15-16 paintings). Enjoy and please give me some feedback!Here are the larger 10 x 10 paintings
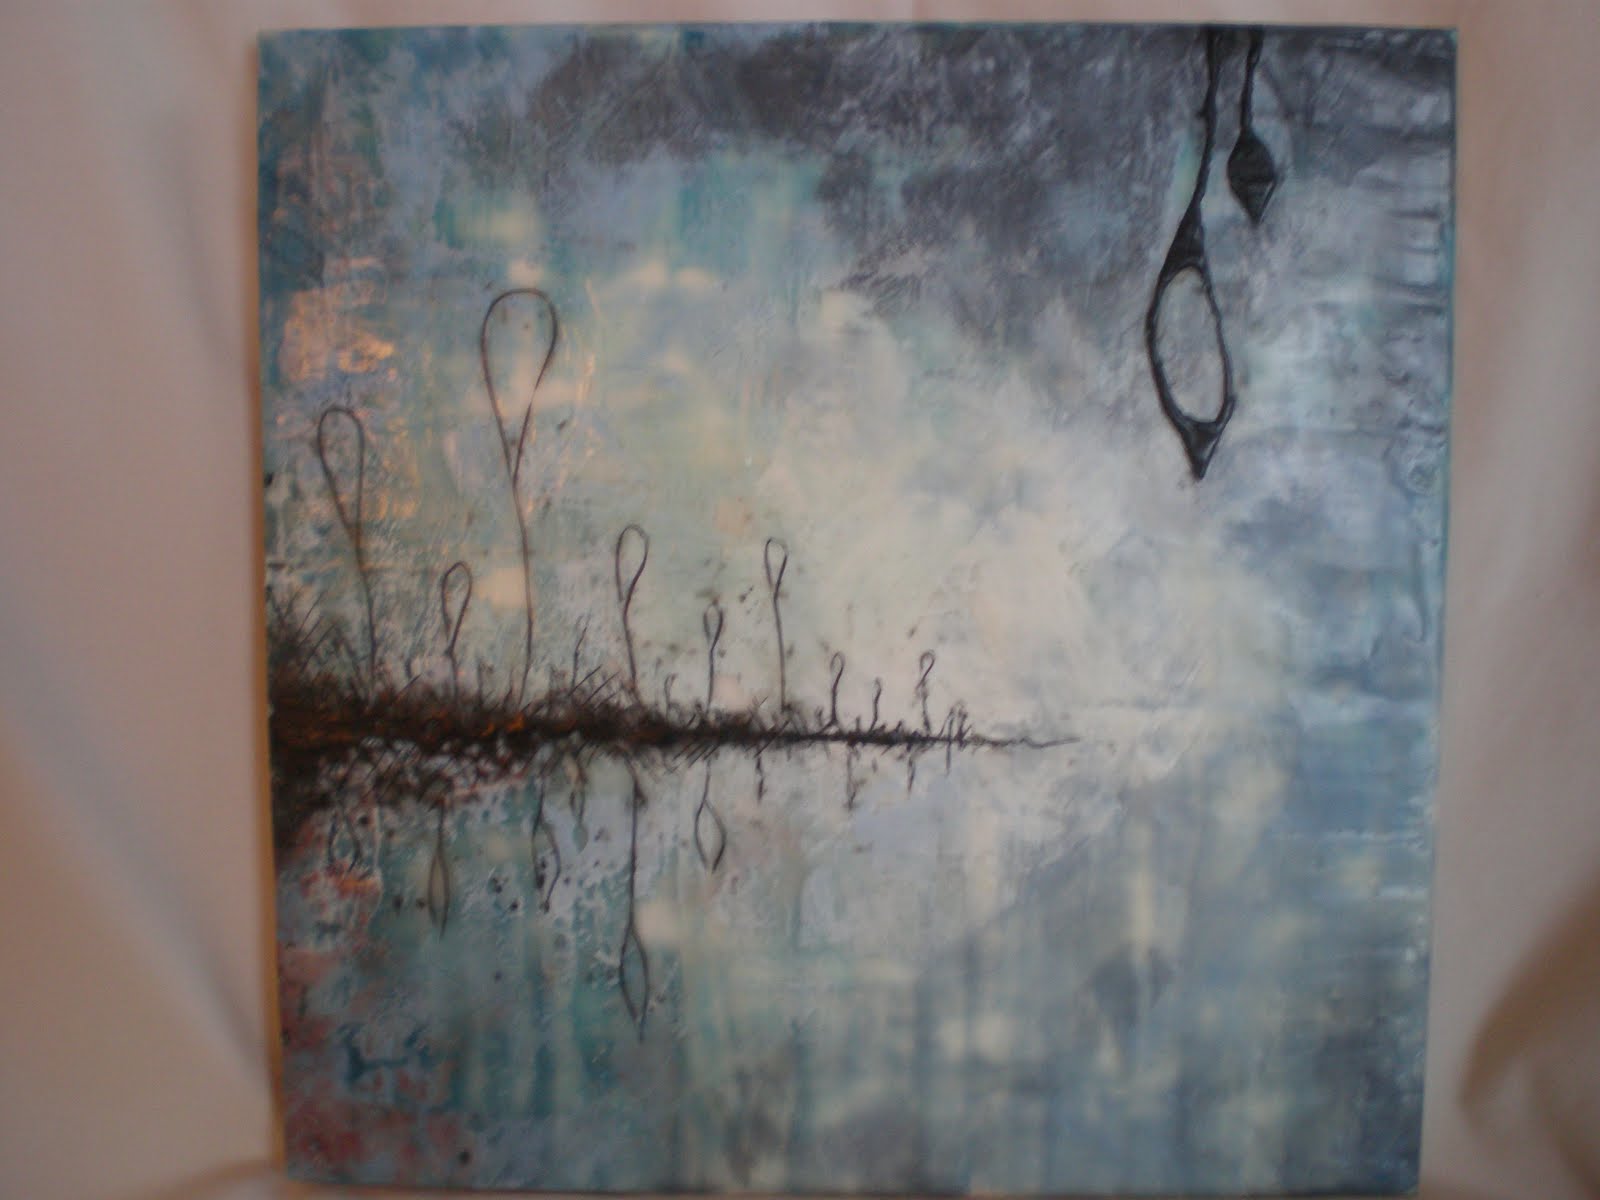
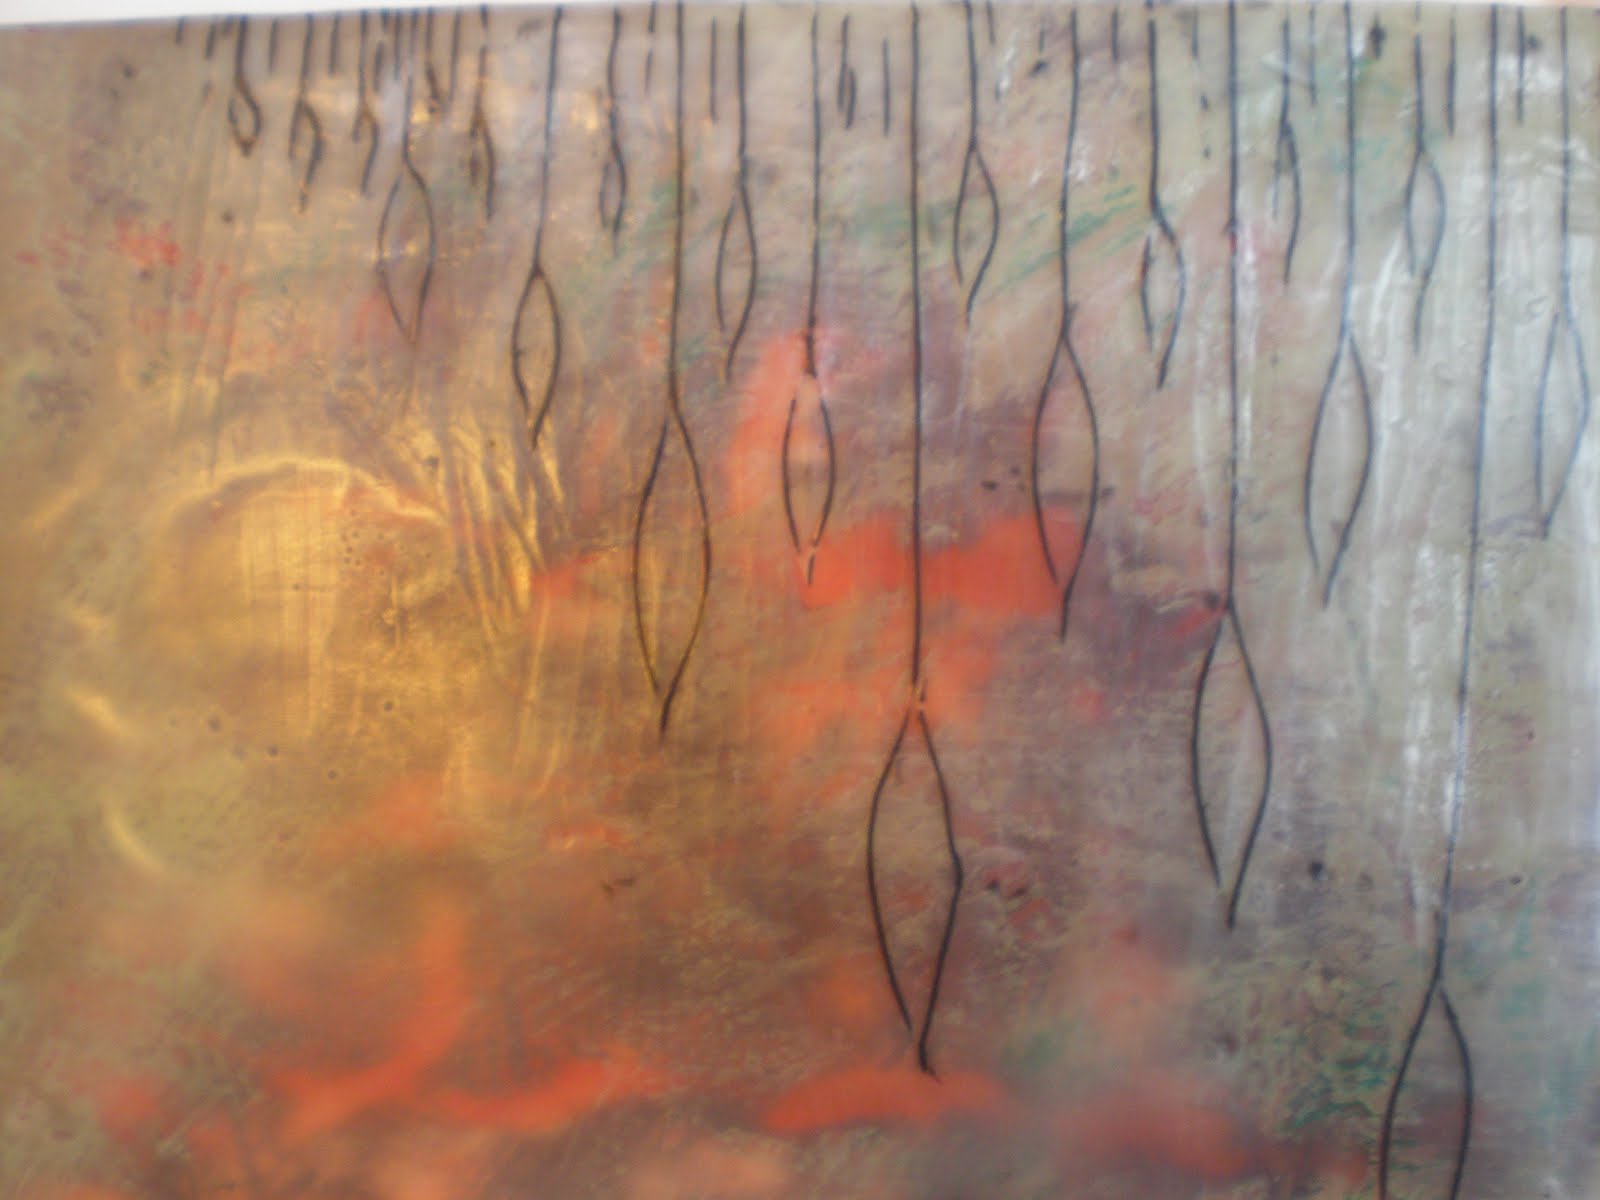
 Here is a detail of the painting above
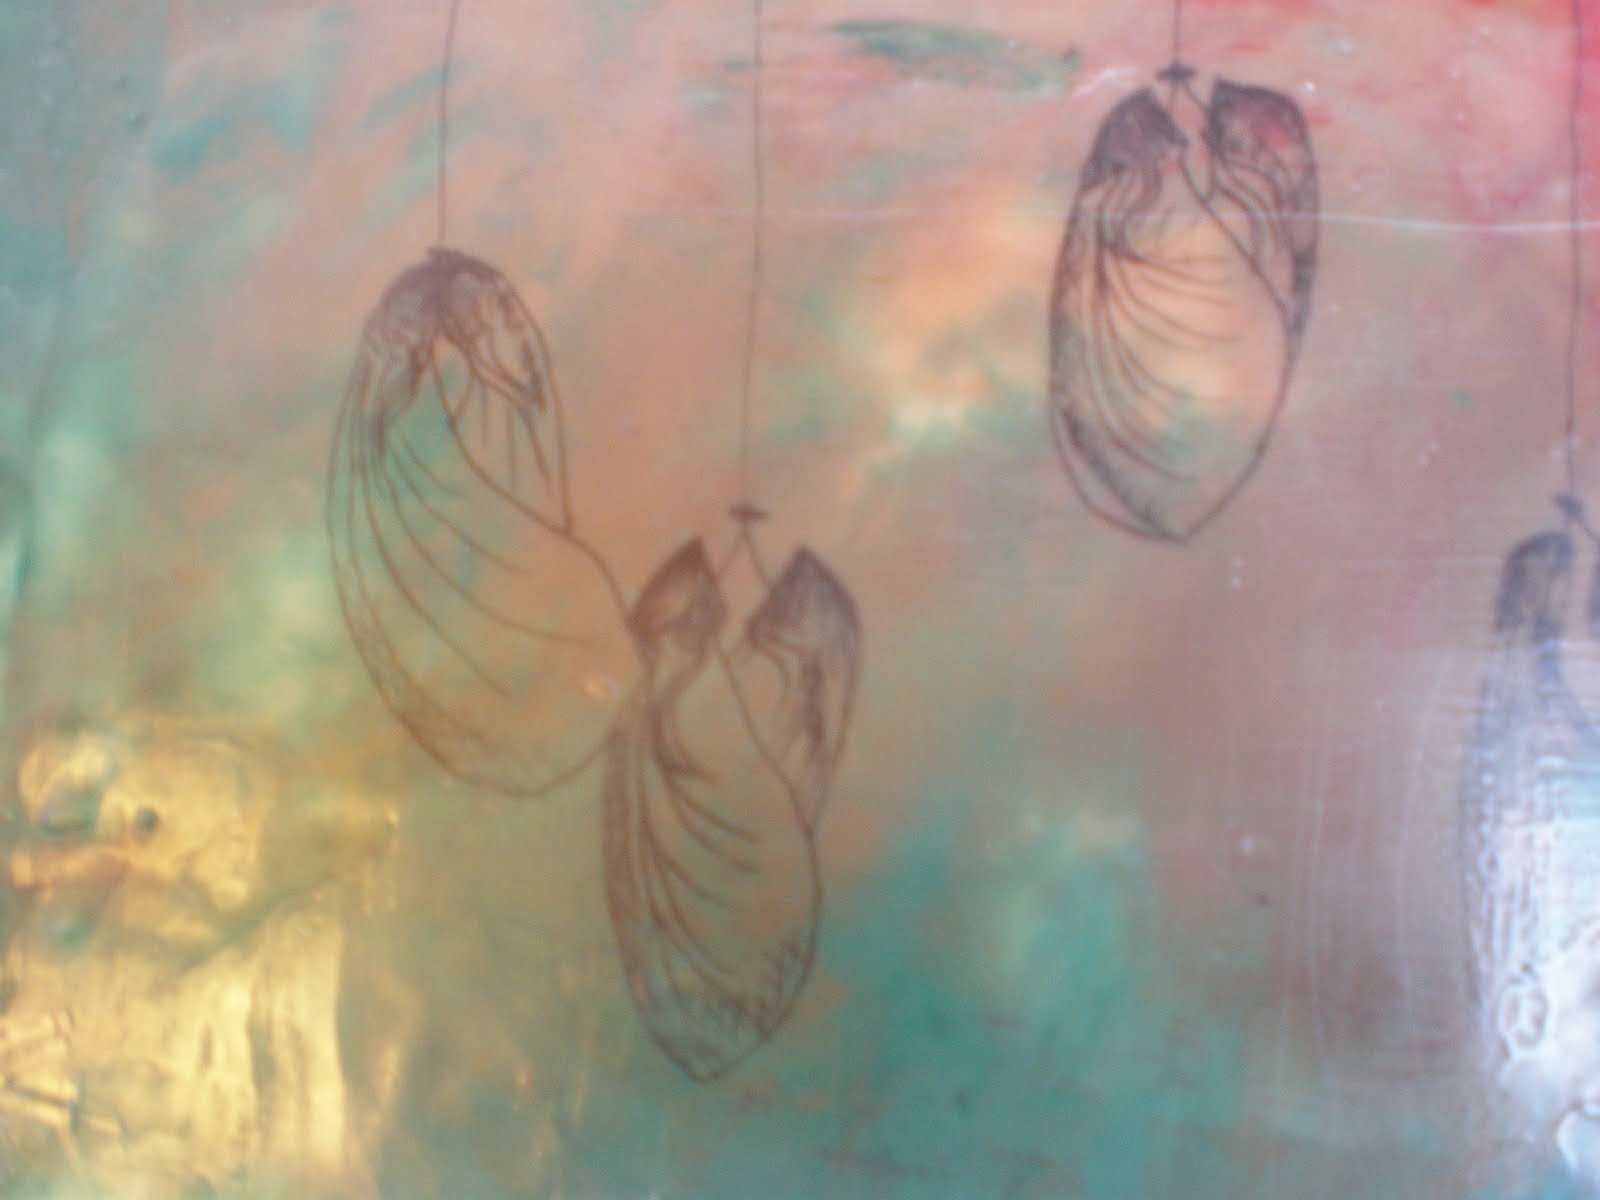
 Here are some details from the painting above
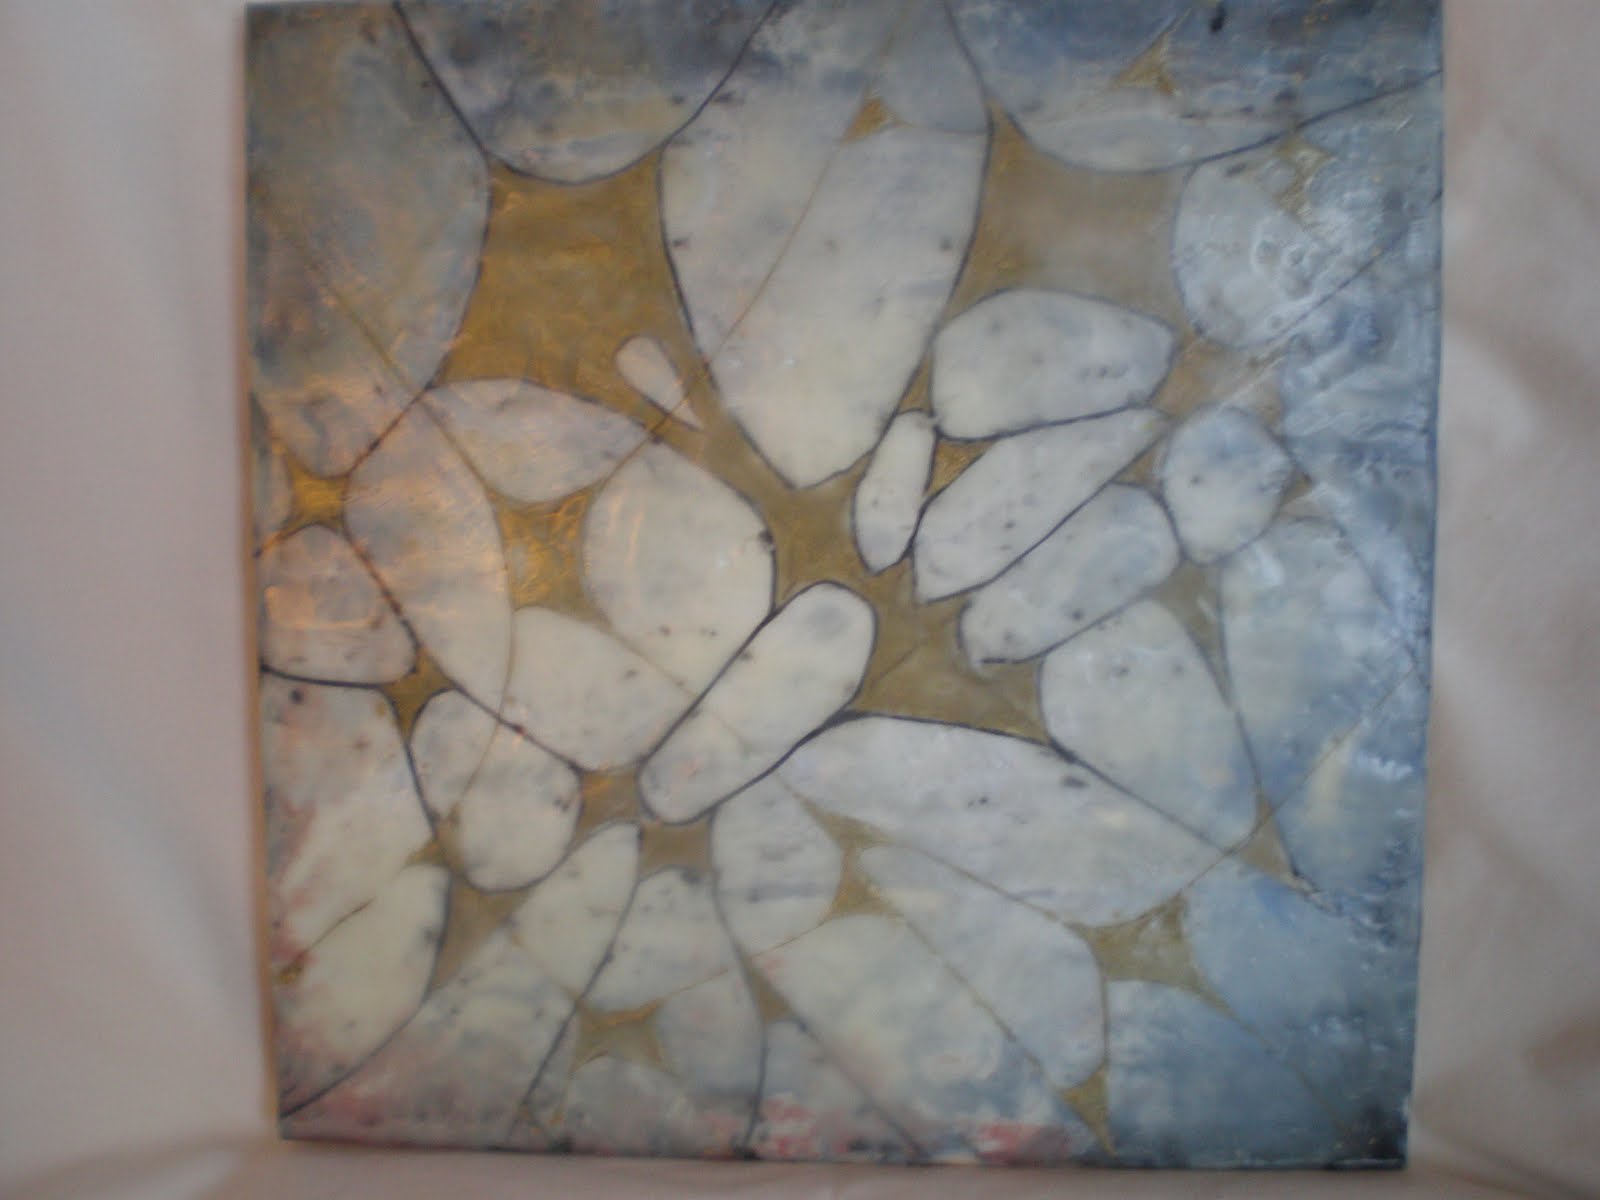
 Here are the 6 x 6 paintings
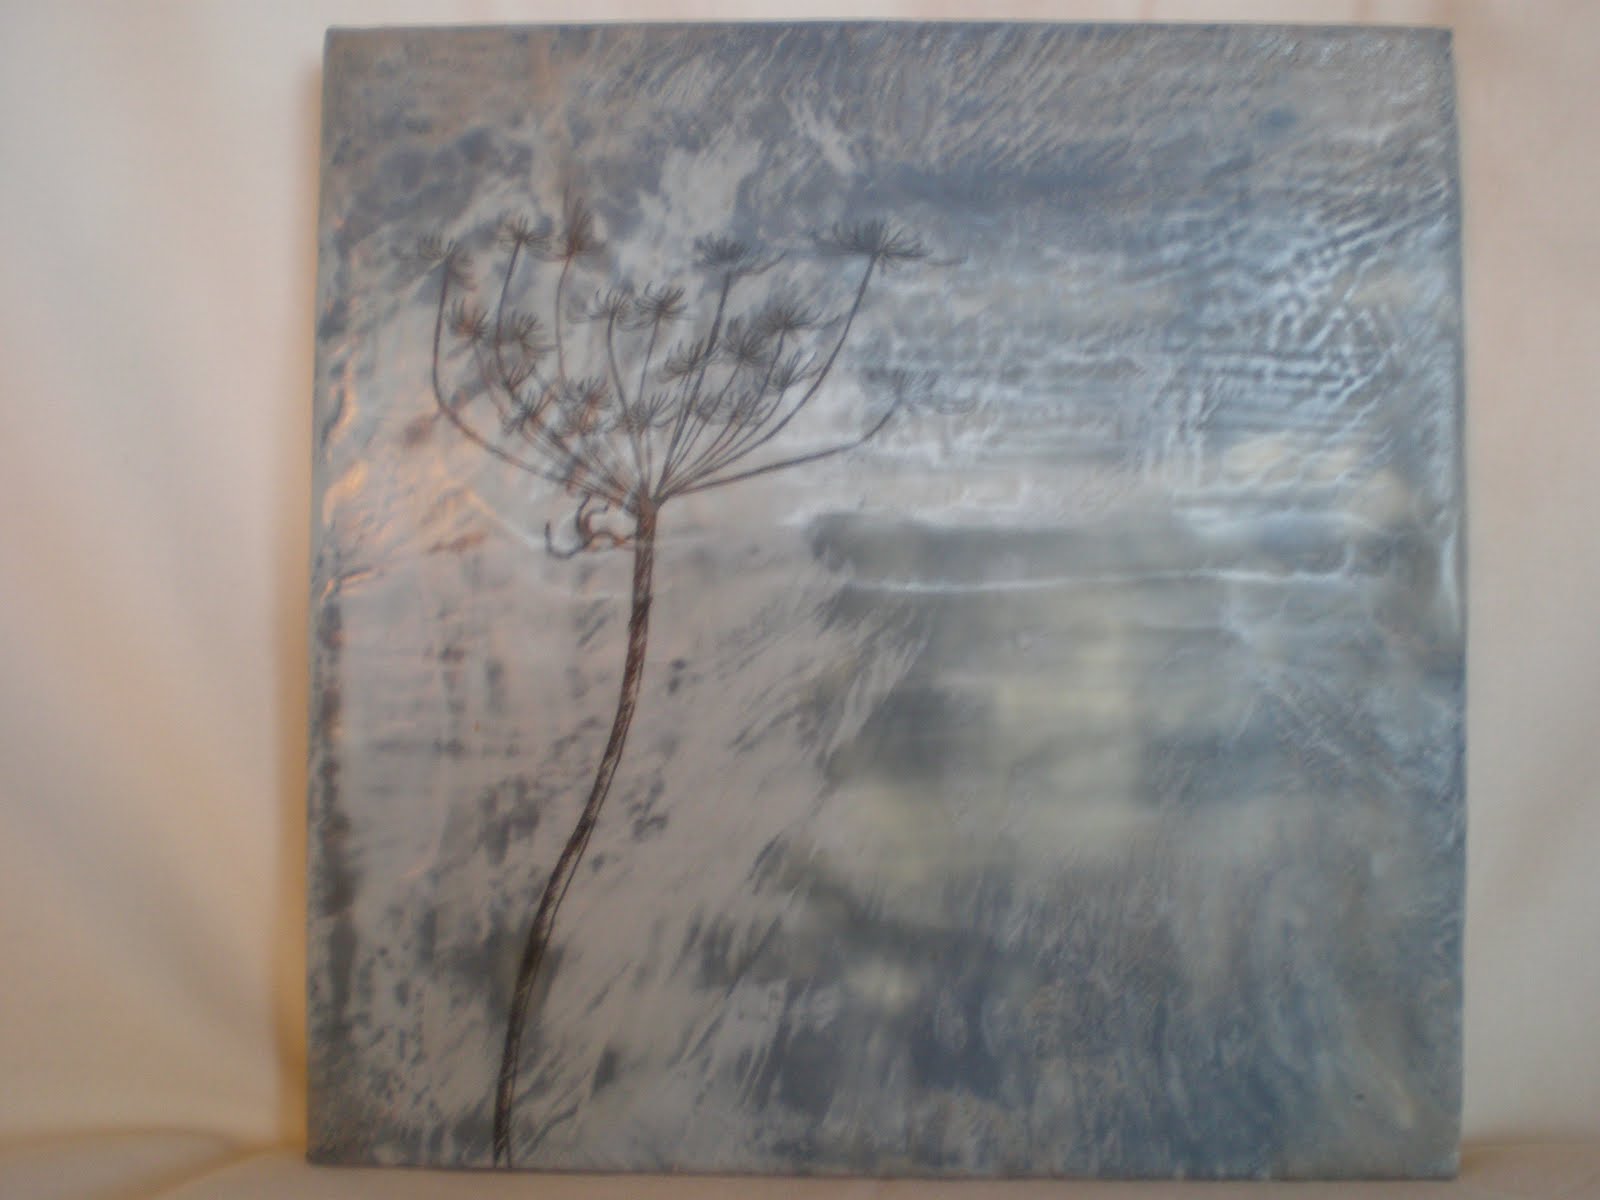 Detail of the painting above
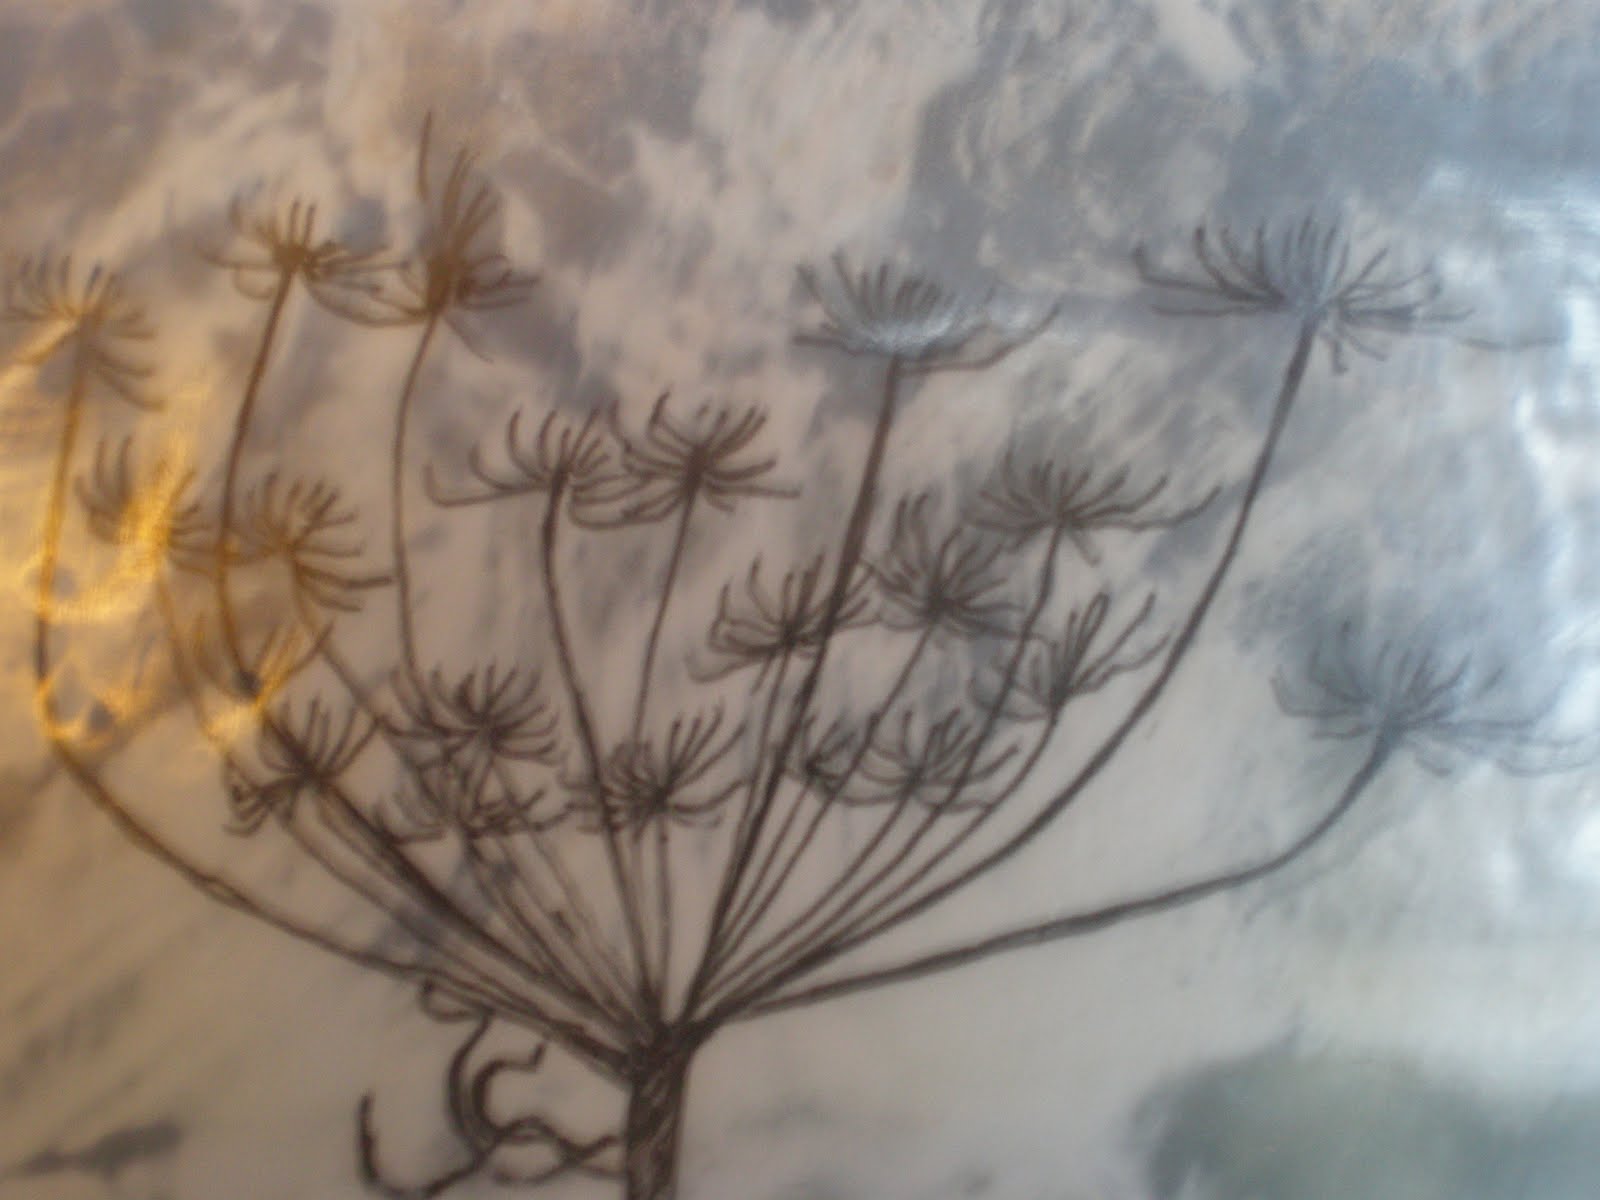
An Explanation of Encaustic
Well, I promised that I’d write an informative post on what exactly it is that I’m painting with and how it works, so here it is. I use encaustic paint which is basically molten wax. The word encaustic means “to burn in” and that describes the process pretty well. Specifically, encaustics is composed of bees wax, damar resin, and powdered pigment for color. Encaustic medium is simply the bees wax plus the resin and is used to dilute the concentrated pigmented wax and to create beautiful transparent effects. Bees wax is relatively durable, flexible, and has a high melting temperature so it won’t melt under gallery lights and normal temperatures in a home. The more resin that is used the harder the surface of the piece will be and the shinier it will be when it’s buffed with a soft cotton cloth. The wax is kept liquid while painting by a heated surface that will reach 225 degrees, like a pancake griddle. You can melt the wax directly onto the griddle, use small metal cups, muffin tins, tin foil, or anything that will allow you to mix the paint and keep it hot. I also like to melt my plain encaustic medium in a big crock pot I bought at the Goodwill for $5.
Encaustic is an ancient medium that Greek artists used back as long ago as the 5th century BC for portraits and panels. The earliest surviving encaustics are the famous Fayum funeral portraits found on mummies that were created by Greek artists in Egypt between the 1st and 3rd centuries A.D. The vibrancy of these portraits is a testament to the archival nature of encaustic paint. Encaustic paint was also used by Rembrandt, Diego Rivera and Jasper Johns and seems to be having a recent revival due to it’s versatility and mostly non-toxic nature.
There are a few simple rules for dealing with encaustic paint. Number one is that you must have a sturdy substrate. Boards, or canvas/paper mounted on boards work best, but other stiff porous surfaces can be used as well. Canvas stretched over stretcher bars will not work because one bump of the canvas and all your hard work may just crack and fall off. Non porous substrates like glass or metal are usually not thought to work because the wax won’t absorb into the surface, however when I was at the Portland Open Studios Charles Sites showed encaustic paintings he did on glass and metal that he sandblasted first. He claims to be the first artist to use this technique and says that it’s fairly archival.
The second rule is that you can’t mix acrylic paint with encaustic wax. That means that you can’t use acrylic gesso to prep a board like you would for oil paintings. You actually don’t have to prep a board at all and can start painting straight onto the raw wood, but if you like a clean white starting point you can glue watercolor paper onto a board using rabbit skin glue or acrylic gel medium (that’s the only ok time to use acrylic), you can stretch canvas over a board, or you can use encaustic gesso that is specially formulated for the process. I used to use the watercolor paper technique, but found that I had uneven absorption of the wax and have since switched to using R & F brand encaustic gesso. It’s a bit more prep time since I have to use two coats but so far I really like it.
The third rule is that you have to fuse the layers with a heat source while painting. This means that every time after you put a layer of wax down on your board you have to melt it together with the rest of the painting or in time the layers might separate and crack off. A heat source can be a heat gun, a propane torch, an incandescent light bulb (100-200 watts), or an iron. Right now I’m using an embossing heat gun which are widely found in craft stores but I’m hoping for my very own propane torch for Christmas (yeah fire!!). The embossing gun works well but blows the air around so once the wax is melted it can blow my carefully crafted details in a molten wax puddle if I leave it in one spot too long. The propane torch is adjustable and doesn’t move the air so your details remain intact. All the heat sources will fuse your wax and are useful for different effects, it’s just a matter of what you’re trying to accomplish and what your personal preference is.
What I really enjoy about encaustics is that you can pretty much do anything with it. You can use it like regular paint, scratch lines in it, incise it, build it up, scrape it back, add texture and collage materials, and even do image transfers. It’s a medium that will become what you want it to. It can be paint, drawing and sculpture all at the same time. My other favorite aspect of encaustics is that there really are no mistakes. If there is a part you don’t like on your piece you can simply scrape it away and start over. The speed of encaustics appeals to my ADD side as well. Since there really is no drying time you can work quickly and finish a painting in one afternoon, unlike oils. It’s versatile, forgivable, fast, and just plain beautiful if done right.
If you’d like to know more about encaustics there are two books I would recommend that are really informative and helpful. There are tons of books out there but these are the two that I saw in every encaustic studio I visited during the tour.
Embracing Encaustic, Learning to Paint with Beeswax, by Linda and William Womack
Here are some of my favorite local encaustic artists and their websites (most of whom I met during the awesome Portland Open Studio tour). Check them out to see all the different ways that encaustics can be used.
-The mother of modern encaustics (and a super nice lady), she created her own line of encaustic paints and kits, but recently closed the business to concentrate on her painting. If you see Wagner paints snatch them up before they’re gone!
-Wrote the book on encaustics…literally.
-Trees and birds and bridges…oh my! Plus she does great stuff for the community like her Recovery Panes project.
http://www.eyesaflame.com/index.html
-Her work is so the stuff I like to buy, which made it more awesome that I won one of her pieces from a raffle during the studio tour!!
-Science and art make a beautiful pairing.
http://www.amystoner.com/Welcome.html
-When I was in her studio I couldn’t decide which piece I wanted to buy most. Thank goodness she’s usually selling during First Thursday on the street located along NW 13th between Hoyt St and Irving St.
I hope this answers some questions about what encaustics are and how you use them. If you have any questions please leave me a comment and I’ll try my best to answer it or find the answer for you.
Peace!
Tour of my studio
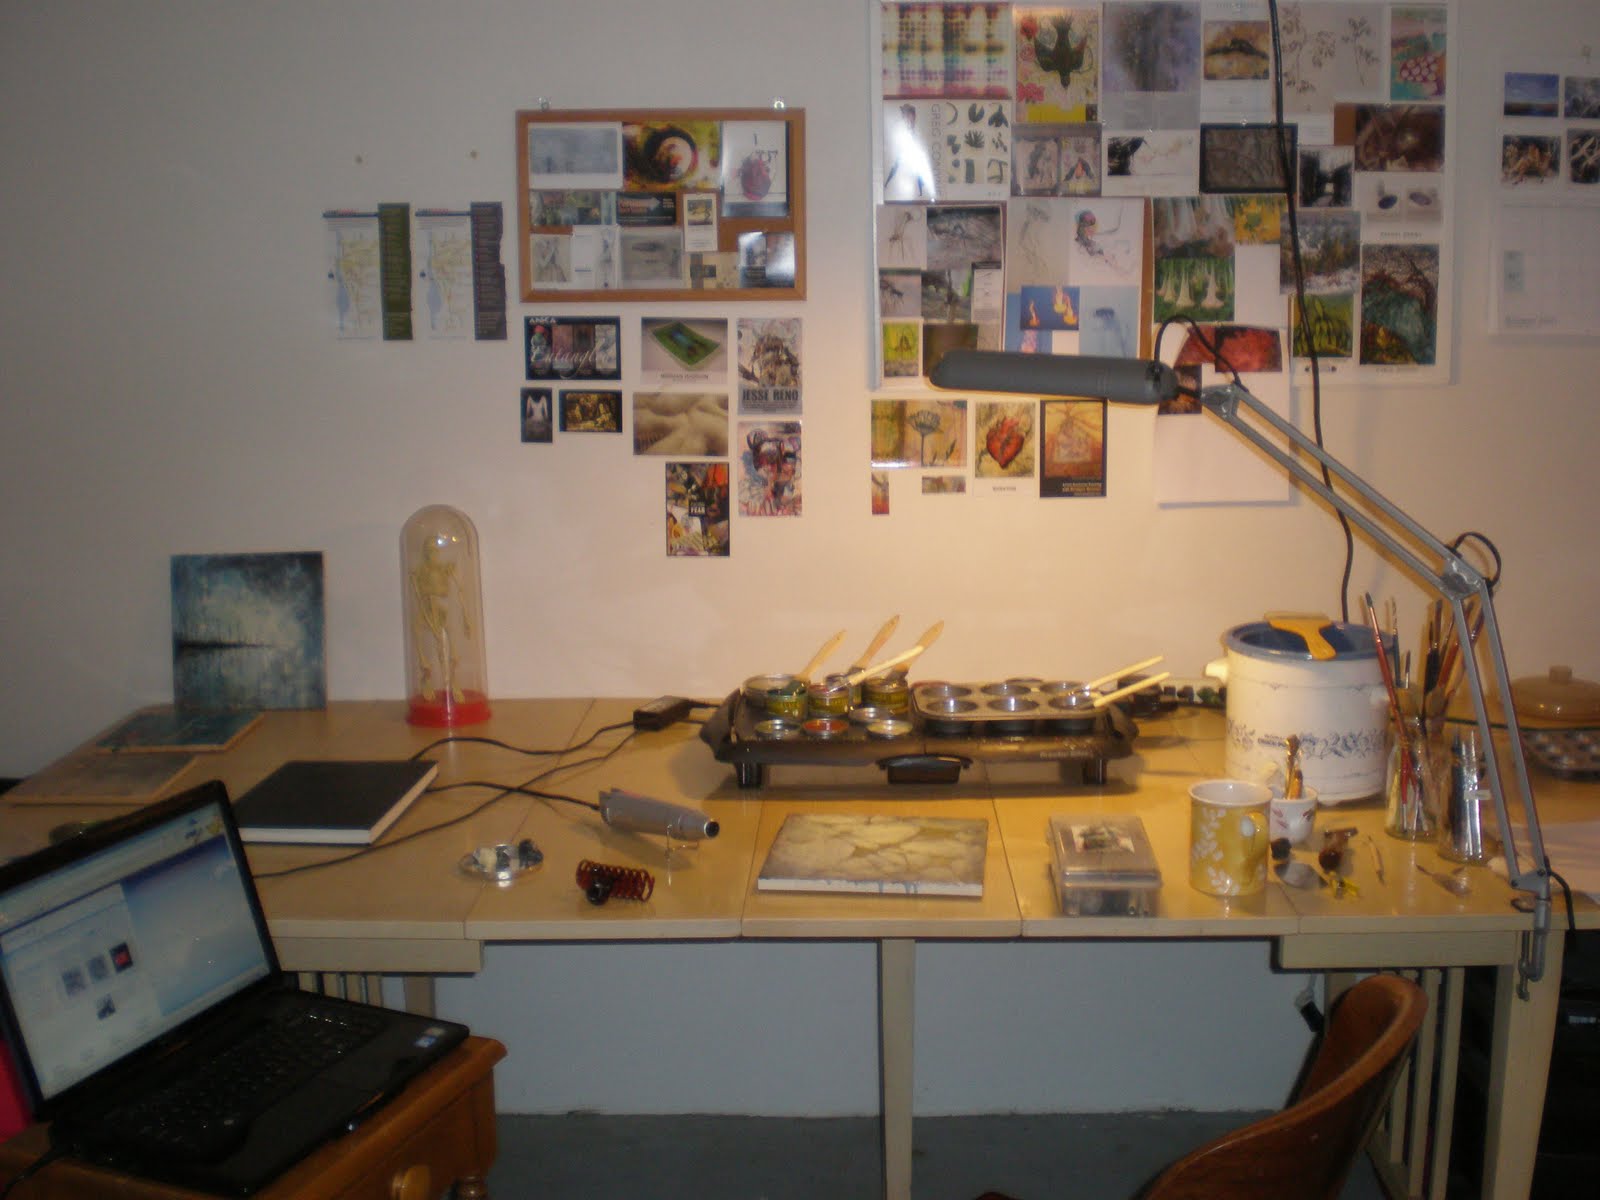
Ever since I went on the Portland Open Studio Tour I’ve been inspired to put together my own studio in the basement. I’ve been collecting tables, art supplies, appliances, and numerous fliers from First Thursdays and the Open Studios. I feel like I finally have a set up that works for me, although I’d still like to organize it further and maybe get some shelves. So, in the spirit of the Open Studio tours I’d like to open up my studio to you! Here are some pictures of the set up I have so far.
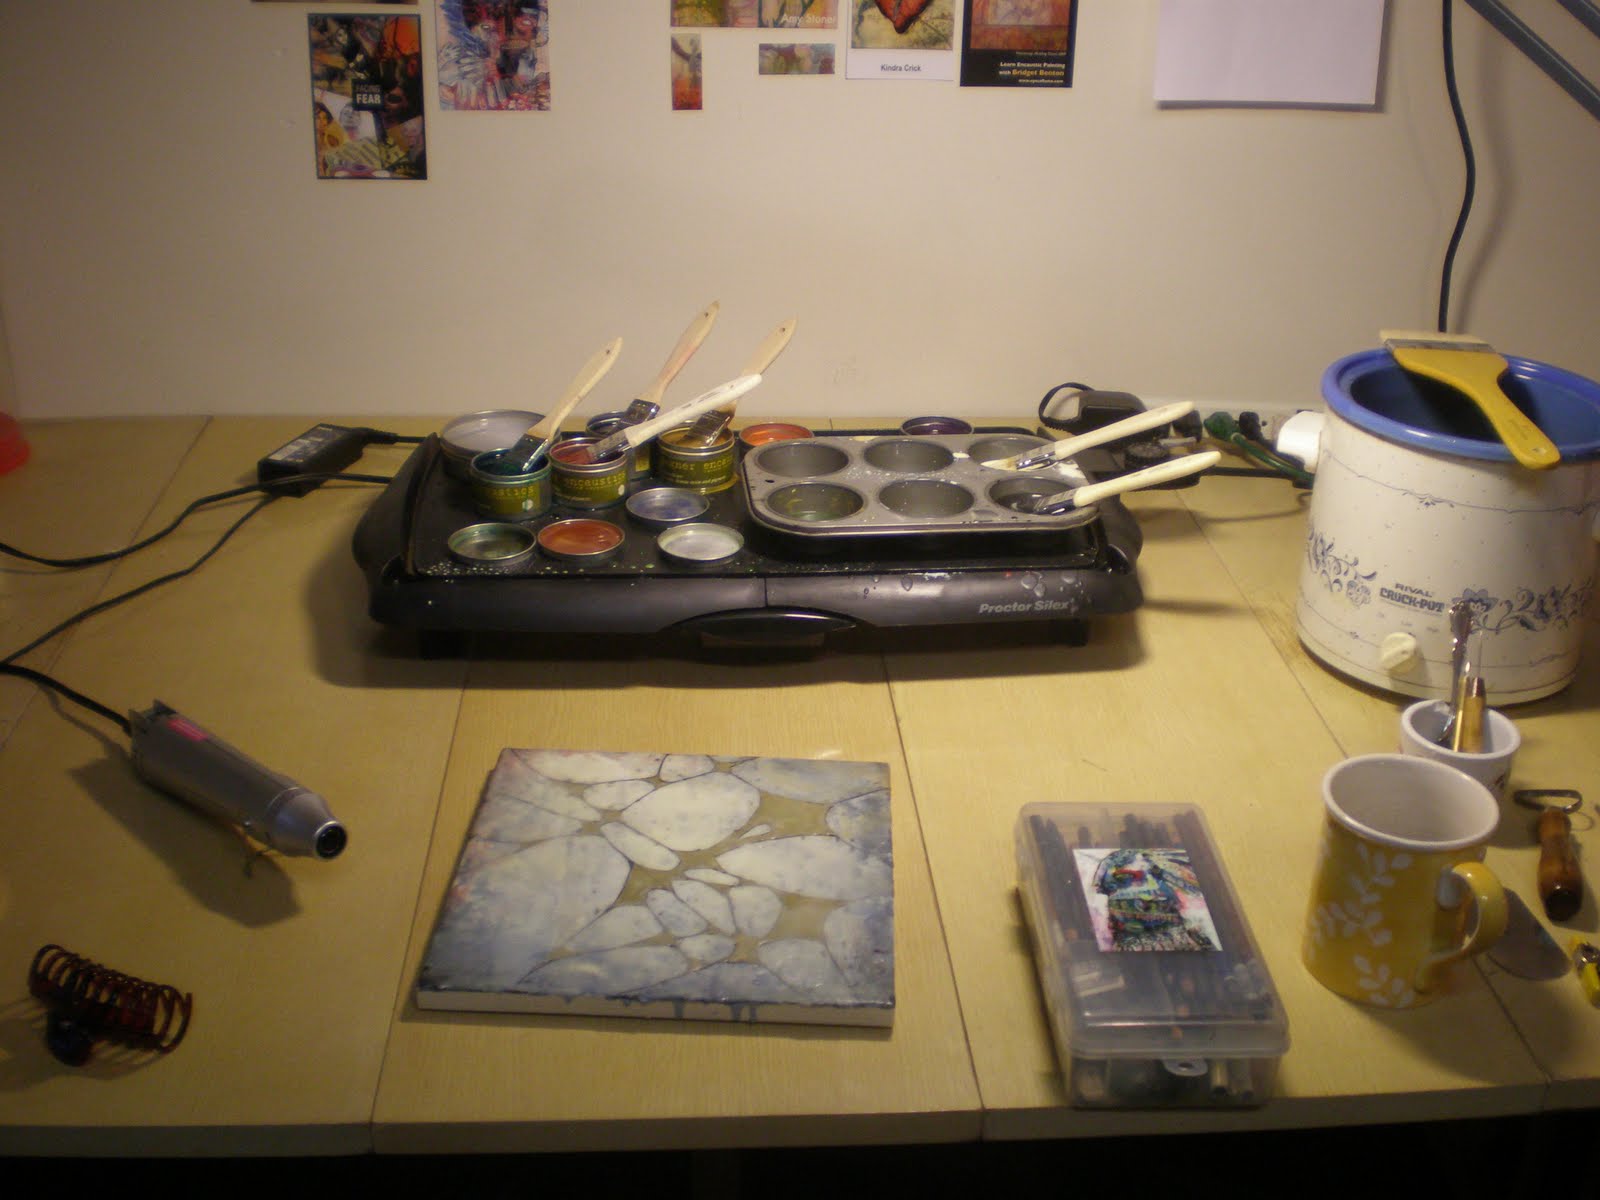 Here’s my palette with my muffin tin for mixing, and my pigments. This is how I keep my wax liquid while I’m painting.
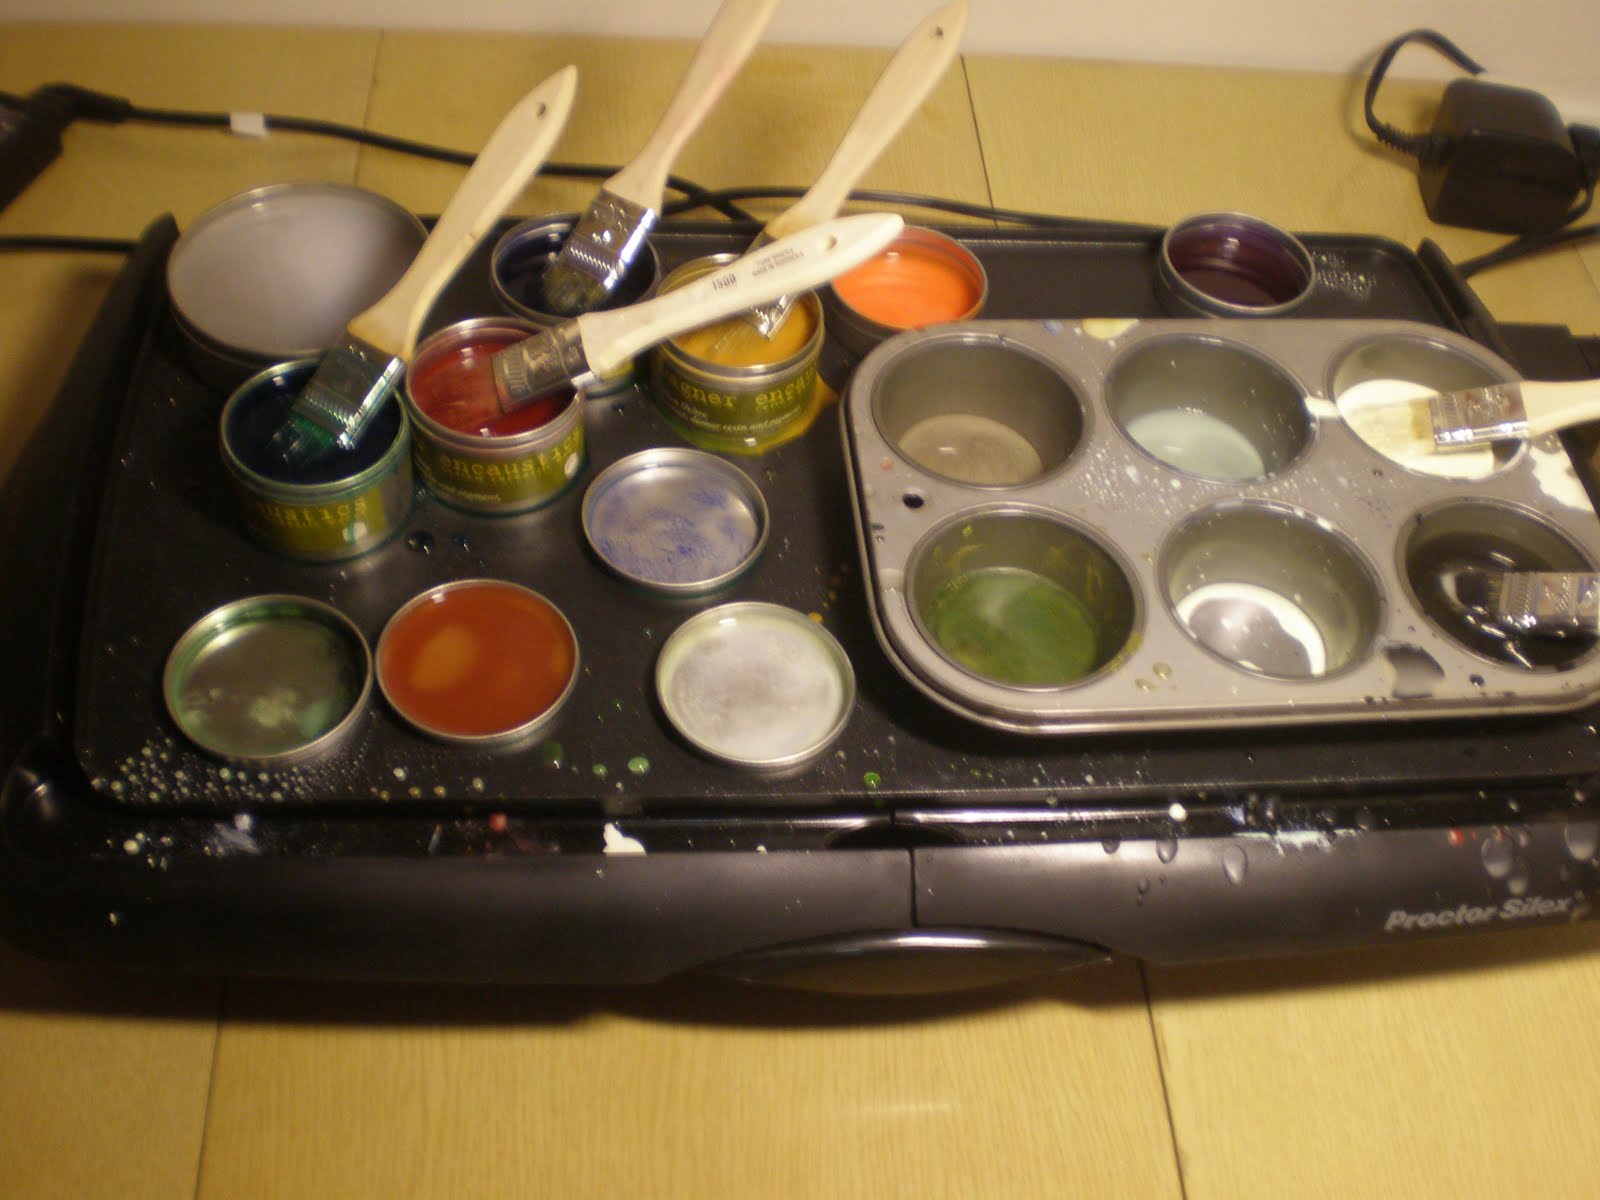 Here’s the crock pot I found at the Goodwill that I keep my encaustic medium in. $5 and it works great! I keep my brushes and tools in empty jam jars.
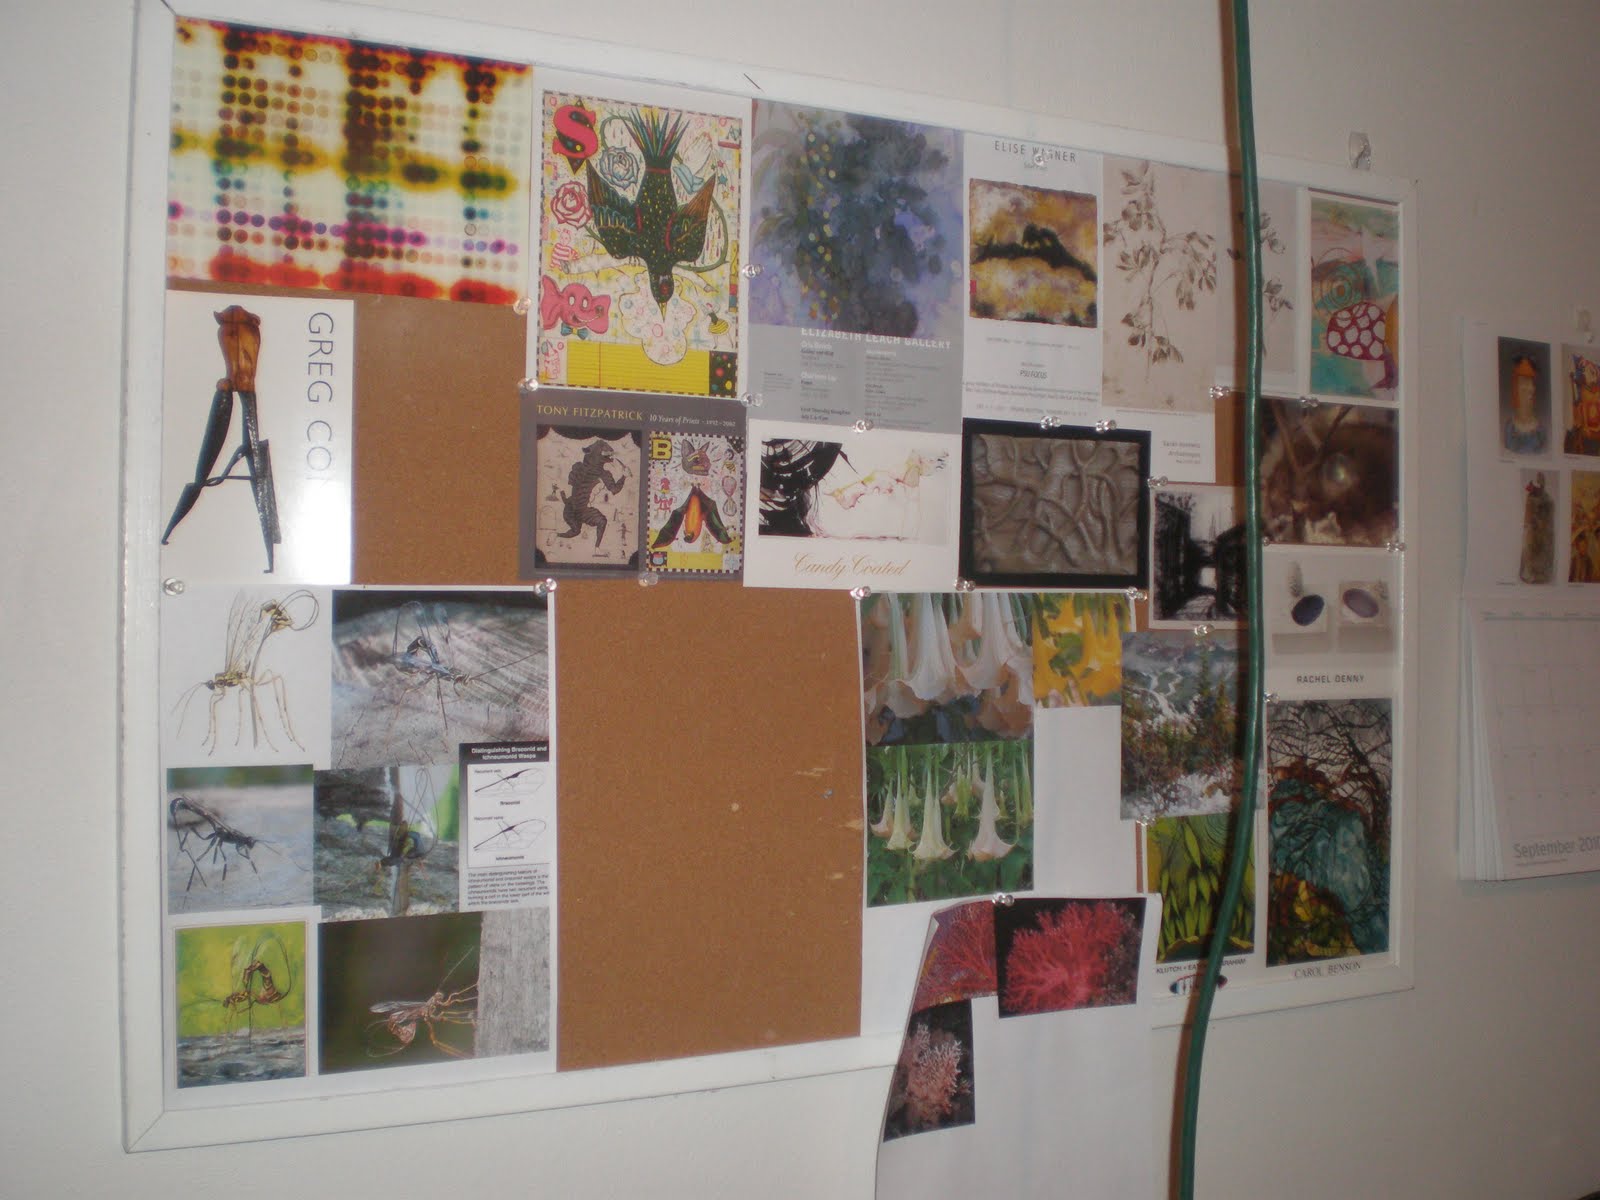
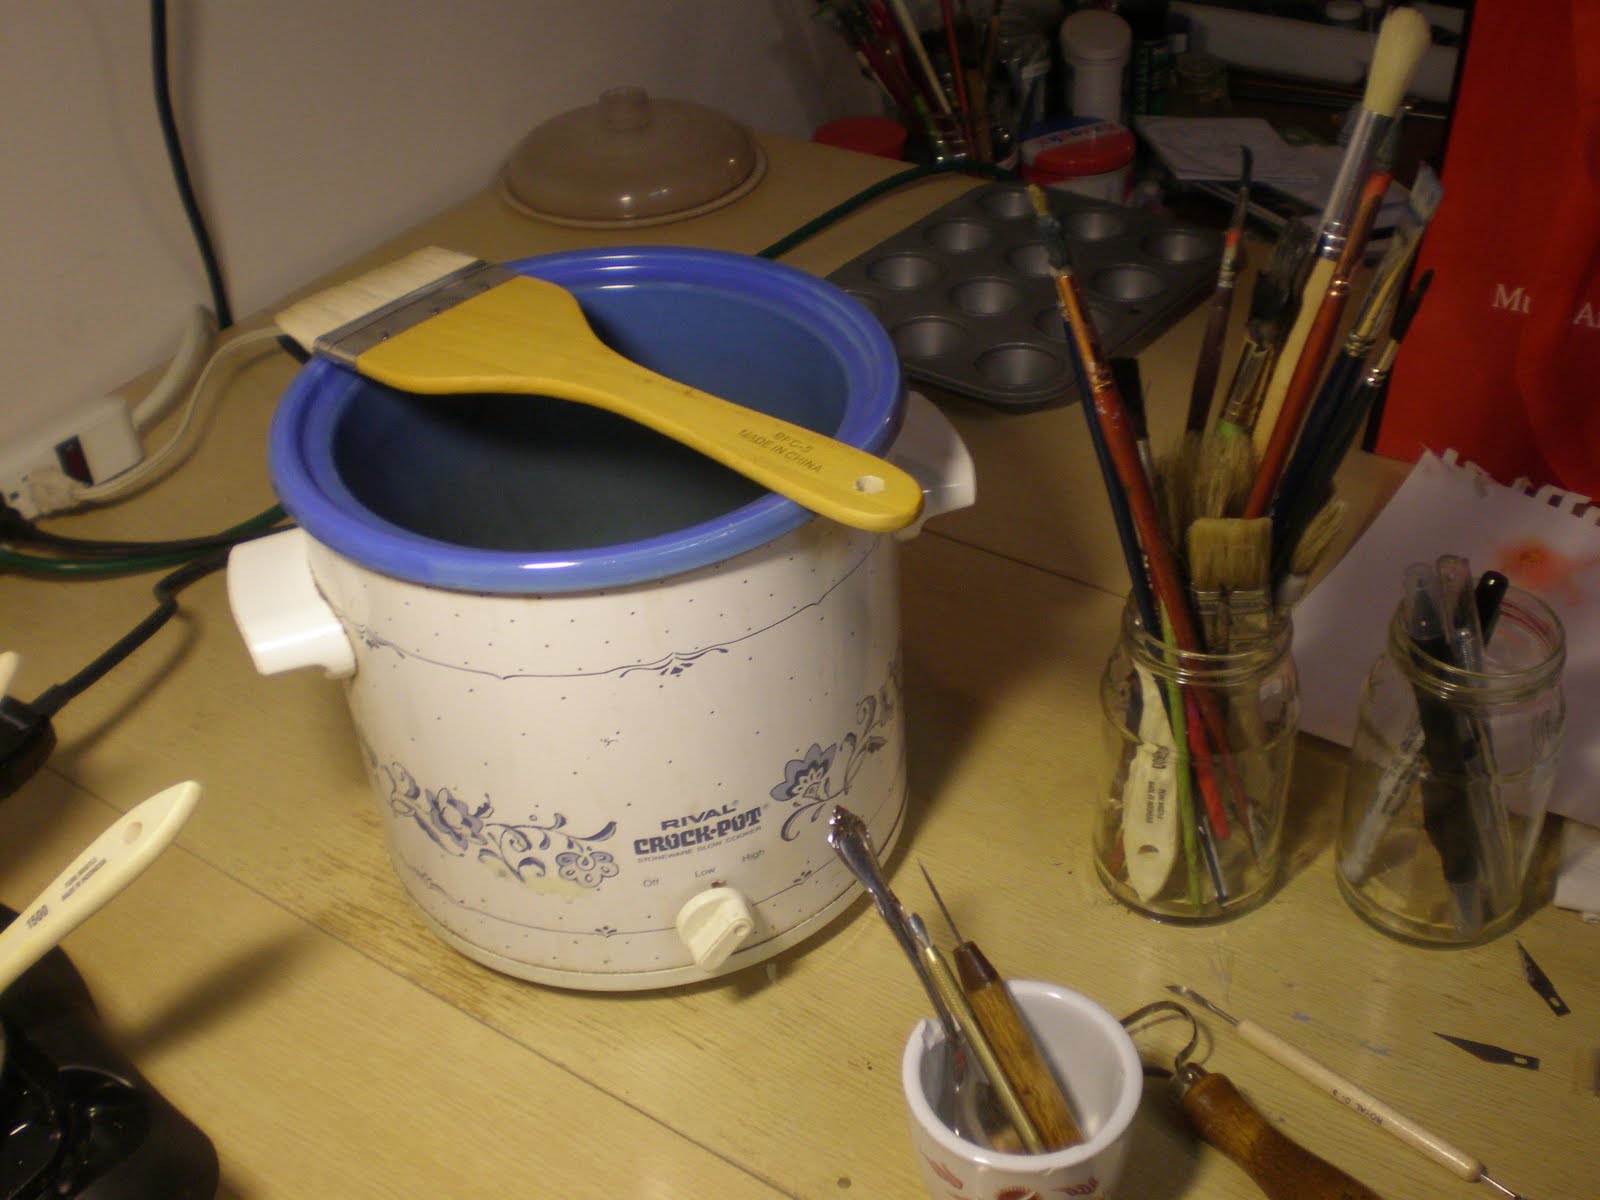 Here are some inspiration boards I made using fliers from shows and artists. I also keep the First Thursday and Friday maps up here too.
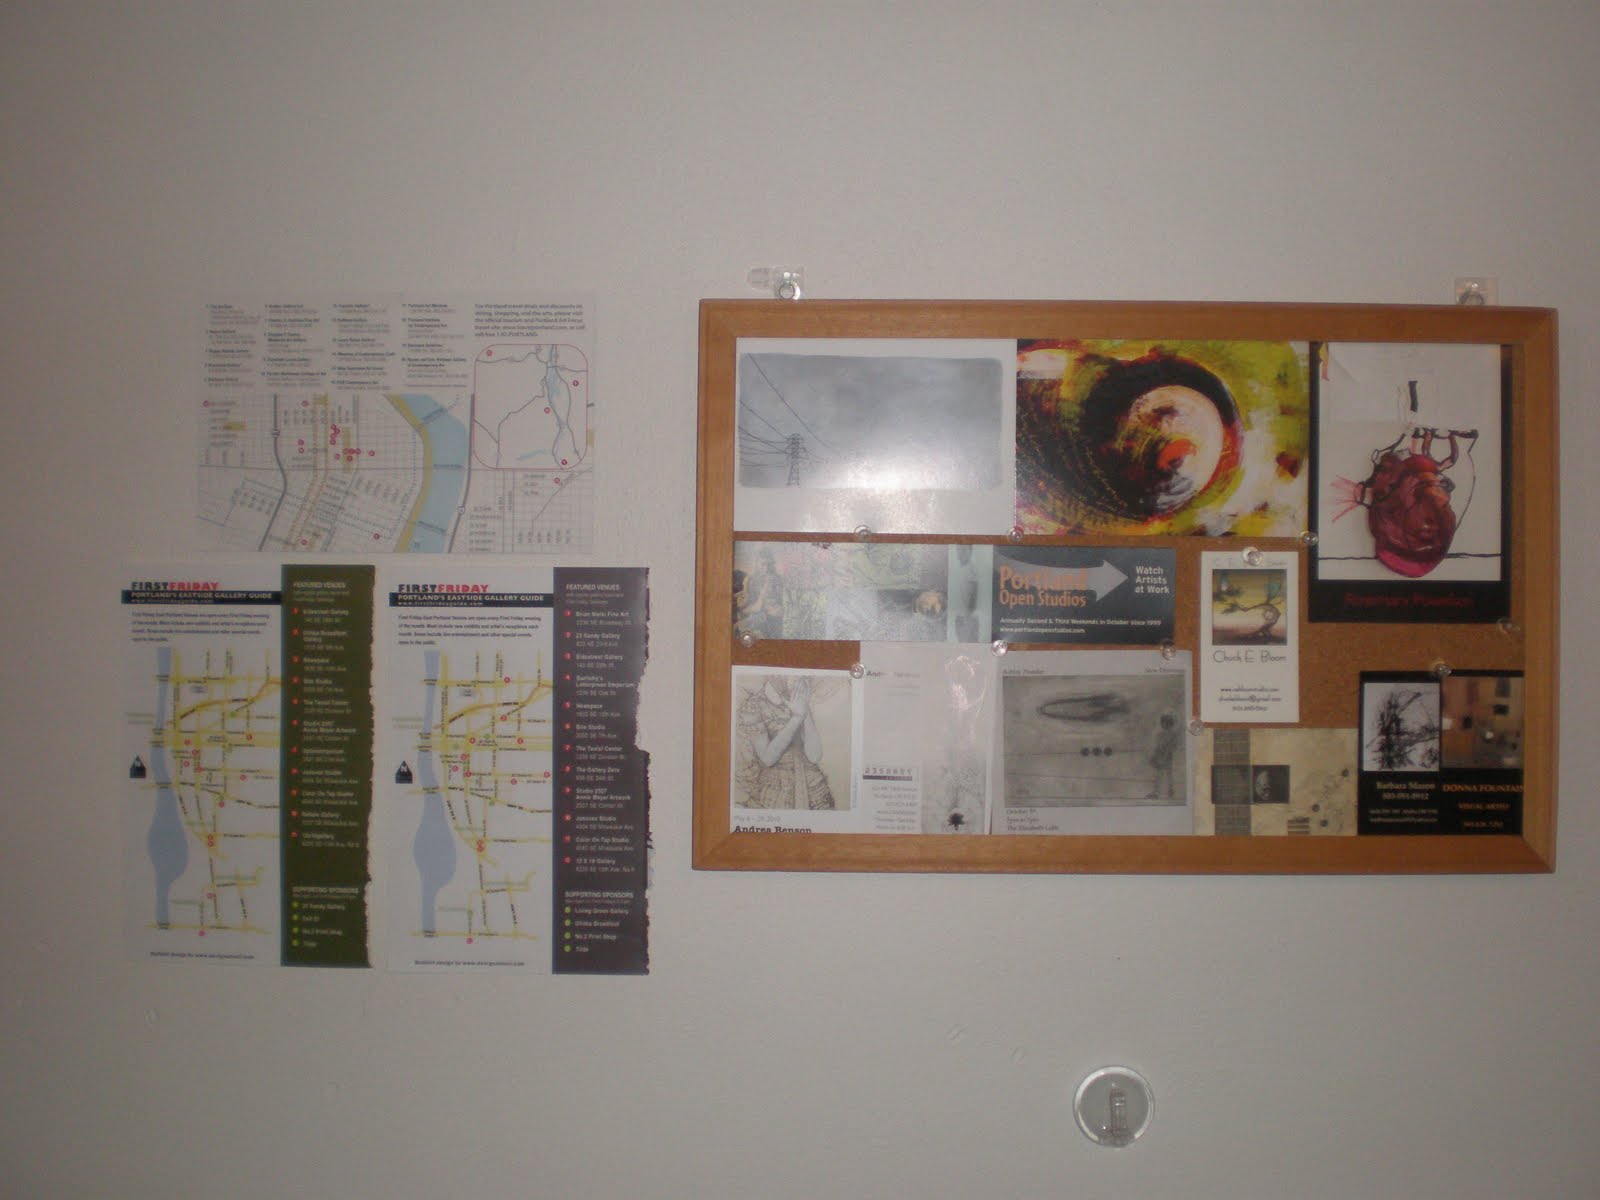
 Where I keep most of my art supplies. I really need to organize more…
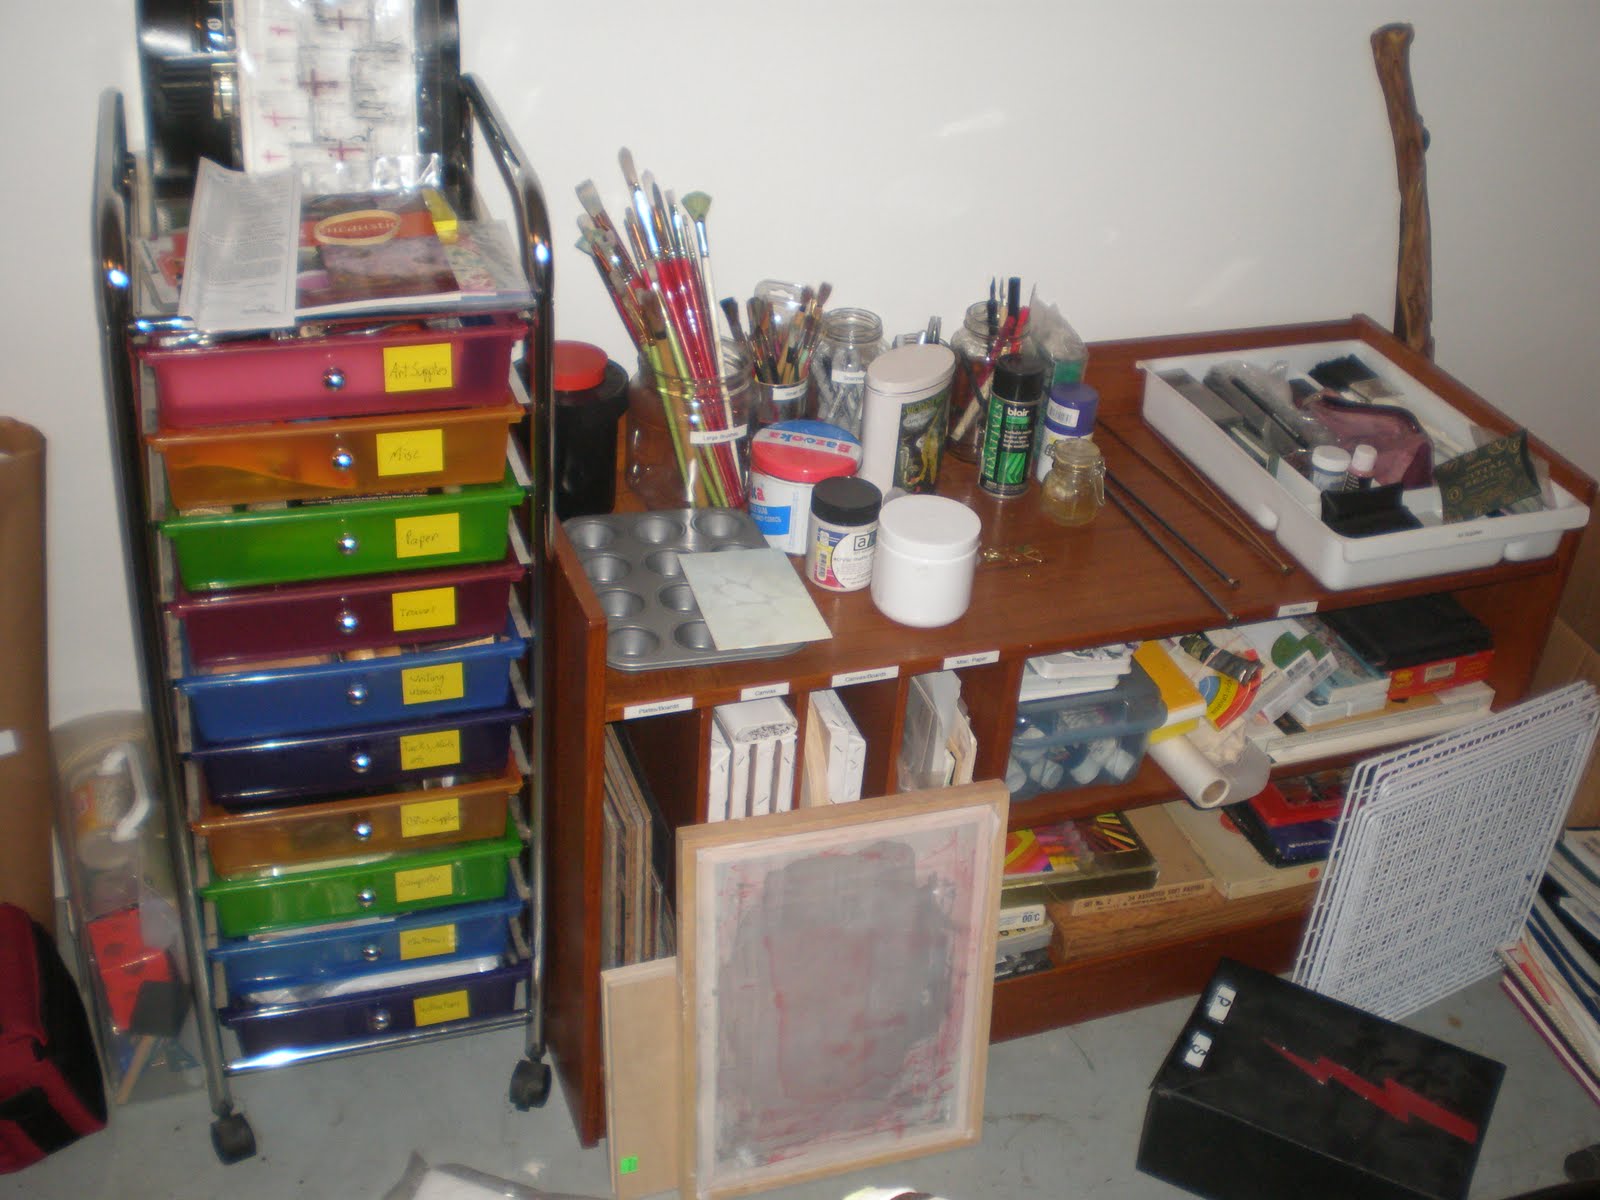 New boards all prepped and ready for painting!
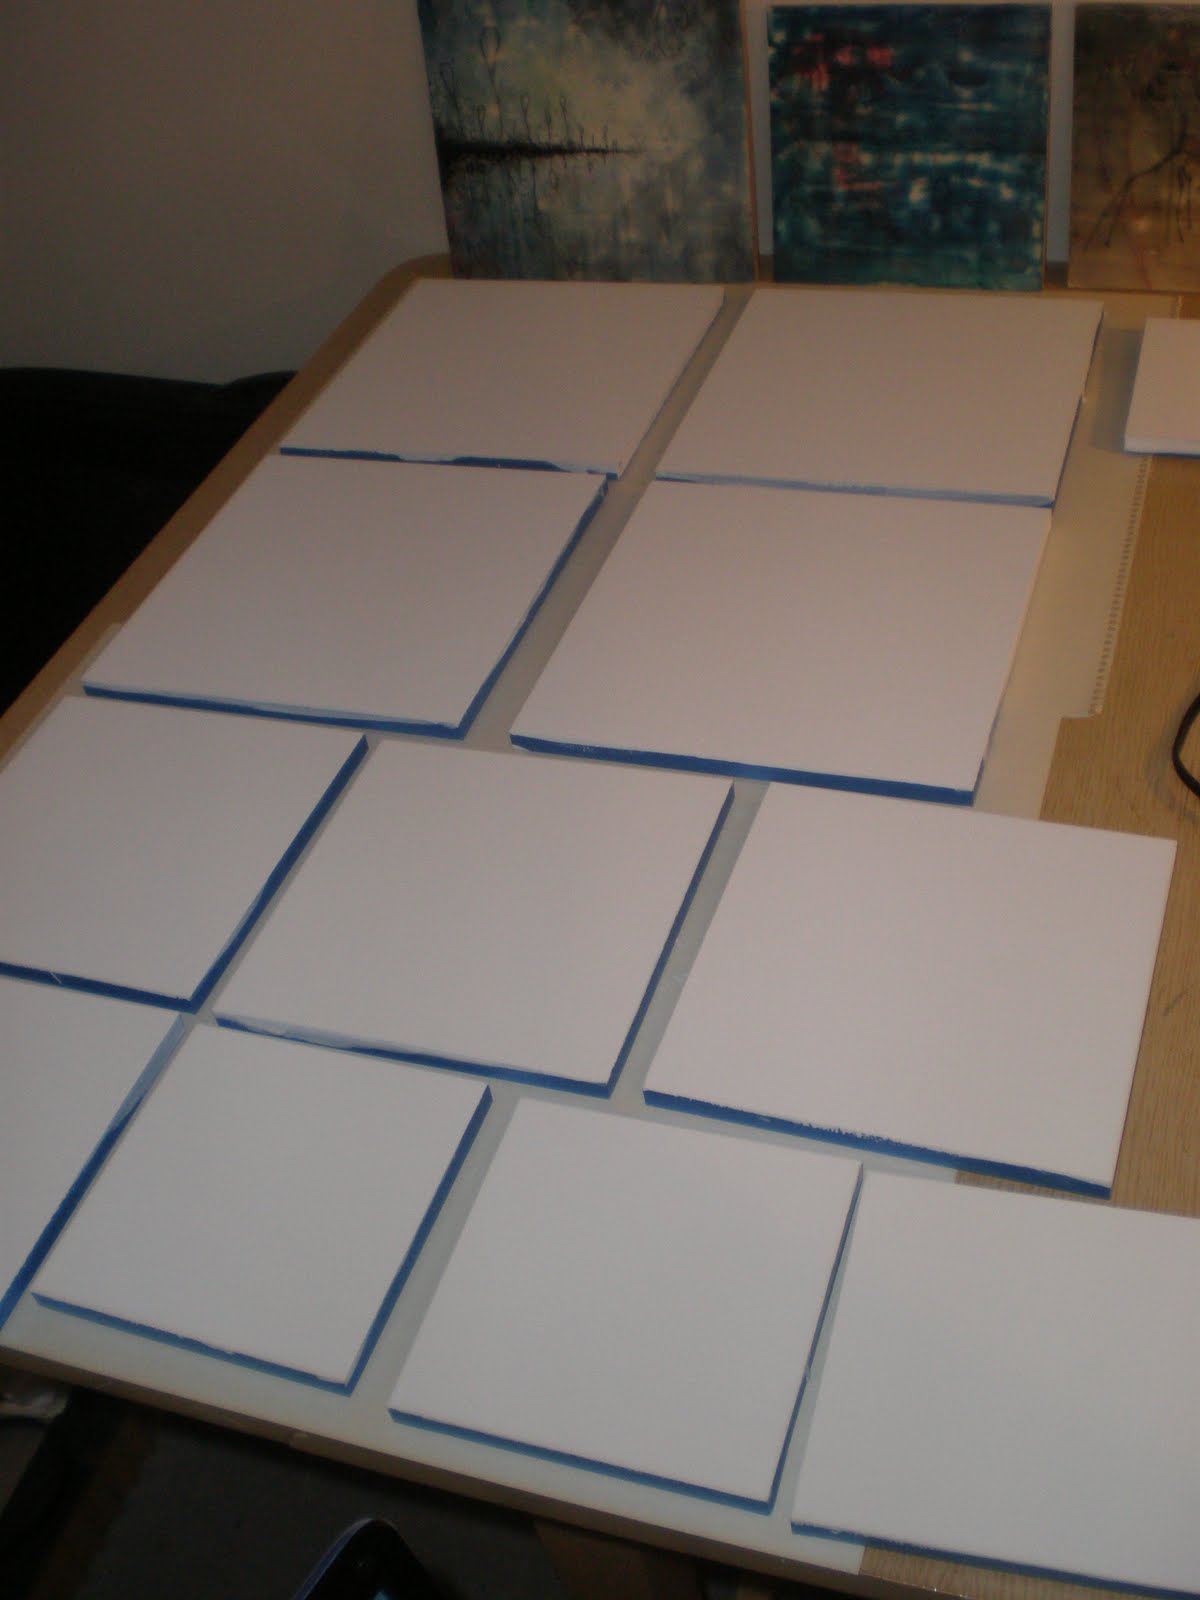 My dancing manikin friends who keep me company down here.
The cons of working from home
Let me first say that I had a great time at my first art show! Lots of my friends and family came out to see me and the art, there were some crazy performances, heaps of food, and a gallery full of interesting art. Although my piece didn’t sell I did get a lot of compliments and a lot more confidence in my work. All in all it was a great experience. Below is a picture my mom took of me by my piece in the show (it was right next to a Chuck Bloom piece! Squee!!) Although the show inspired me to make more work it’s still hard for me to get motivated on a daily basis. Here’s my dirty little secret: I’m kinda lazy and make a terrible boss for myself. When I first started to seriously consider this art adventure I had visions of myself waking up at dawn to run five miles or do yoga, reading serious news stories while drinking coffee, then working for hours in my studio on groundbreaking paintings, stopping only for a quick salad until dinner. The reality is more like I would wake up at dawn to turn off my alarm before it even went off and go back to sleep until about 10am when I would guiltily crawl out of bed and putter on Facebook and I Can Has a Cheeseburger. I’d surf the internet until I was so hungry I either had to go running or give up and just have breakfast/lunch, which I would usually eat while watching episodes of Intervention which assured me that even though it was 2pm and I hadn’t brushed my teeth things were still good because at least I wasn’t addicted to meth. If I got down to my studio during the day it was only for a couple hours and I never got much done, but still congratulated myself for even entering the basement.Seriously if I was working for a real company I would have been fired long ago. The thing is that when I’m working in the schools or have a real job to leave the house for I’m pretty motivated and hard working, but I’m just not strict enough with myself. I think that part of it is that it I don’t have to leave the house to work and thus get distracted by the A and E’s awesome shows full of dysfunctional people and giant piles of dishes in the sink. If I want to have a shot at being a successful artist I have to treat this more like a regular job with set hours and a schedule, even if I am in my muffin pants and pink slippers. During a rare fit of motivation I made myself a strict schedule that made time for things that were most important to me: painting, running/working out, reading, and some quality time for dinner with my husband. Today is day one of following my schedule because last week I was sick and mainly lay around watching Hoarders and eating Lipton’s noodle soup from a box. So far so good…I’ve run for the first time since my race, showered, had breakfast, and even remembered to take my vitamins. I’m running 15 minutes behind schedule but am all ready to go down into my studio before noon. I’m feeling so productive I might even get around to brushing my teeth before Mike comes home.If you want to see the anal retentive schedule I’m created for myself I’ve posted it below. Lets see how long this productive feeling lasts for…
| MWF Schedule | |
| Time | Activity |
| 6:30am | Wake up, change & stretch |
| 7:00-8:00 | Workout |
| 8:00-9:00 | Shower, change, get ready |
| 9:00-9:30 | Breakfast |
| 9:30-10:00 | Research, email, blog |
| 10:00-12:00 | Studio time |
| 12:00-12:30 | Lunch |
| 12:30-5:30 | Studio time |
| 5:30-6:00 | Cleaning time |
| 6:00 | Start dinner |
| 7:00-8:00 | Dinner |
| 8:00-9:30 | Free time |
| 9:30-10:00 | Get ready for bed |
| 10:00-10:30 | Read in bed |
| 10:30pm | Sleep |
My first show!
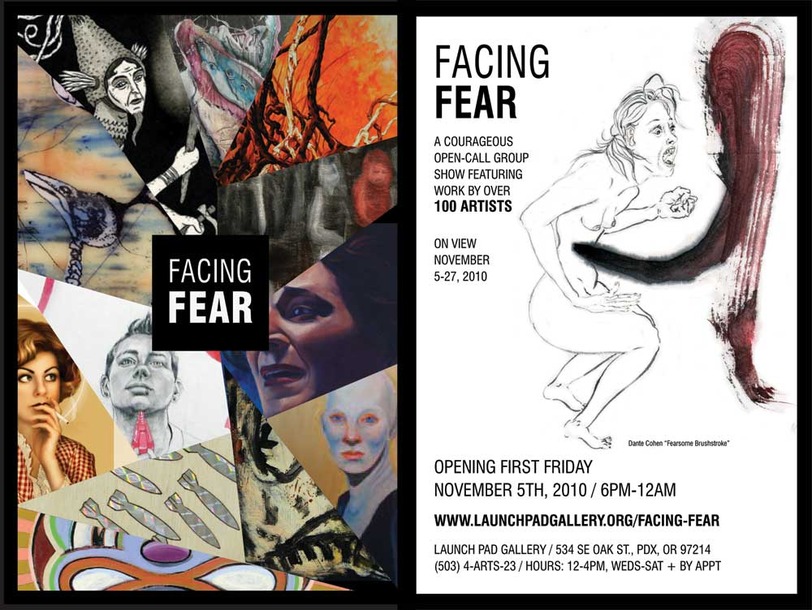 Exciting art news! I have an art piece in a group show in Portland!! It’s at the Launch Pad Gallery and there it will be a part of the First Friday art receptions that happen on the East side. The show is called Facing Fear and 100 local and emerging artists are participating (including me!). The reception is on November 5th from 6-12 and the gallery’s address is :534 S.E. Oak StPortland, Oregon 97214-1140 (971) 227 0072I’m even on the show card! My image is the creepy little bird skull on the left side. Considering there were 100 artists and only a handful got onto the show card I feel really special! I spent a day walking around Sellwood passing out show cards at the local galleries and coffee shops I was so excited.I’m putting in an older piece I that I got a nice new frame for and I’m hoping that someone will buy it! Not that I would earn a lot of money from the sale, but the thought of someone loving my art enough to buy it and find a special place for it in their house would be gratifying. It feels like things are slowly starting to pick up speed a little, but I need to make a lot more work before I can really get the ball rolling.Come and enjoy the show, look at the art, eat some snacks and talk to all the artists. I hope to see people there!Peace!
Starting Over
Well, this year didn’t exactly go according to plan. I applied to about 13 different teaching positions and only got one interview for an after school day care program who took one look at my resume and told me I was over qualified. September came and went and all my teacher friends went back to school and I was left behind. I felt like staying in bed for a week. It was tough because I worked so hard to get my license and nothing has come of it. I have a 4 point and taught in a foreign country!! Does that mean nothing to you people?! Everyone has advice for me. Subbing is their main solution. I’m sorry, but teaching subjects I’m not qualified in, with students that aren’t mine, in a school that probably turned me down for a teaching position…nothing about that gets me excited. I also don’t want to just teach art classes at my house after school because I don’t want to be used as daycare, I don’t have any supplies, and what about liability? What if little Timmy lights himself on fire in my house while we’re drawing (don’t ask why there would be fire, I’m sure they’d find some)? Right now I don’t want to take on children without the support of a school. So, that leaves me with what options? Work at a coffee shop or warehouse like I used to? Retail? Office work? Waitress? I’ve been on the teaching path for so long that most of my non-teaching positions are more than 5 years ago. I’ve now had 11 jobs in my life and feel exhausted by the meaningless work, awful coworkers, incompetent bosses, and constant threat of being let go. The more I thought about applying for jobs the more depressed I became. I didn’t want just a job, I wanted a career. My teaching path might be at a stand still, but that doesn’t mean I have to be. After a lot of thinking, sleeping in too much during the weekdays, and one too many nights surfing the internet past a reasonable time, I decided to become a full time artist. It’s not something I ever considered before because it seemed so uncertain and open ended, but right now it feels like exactly what I need. It can become whatever I make of it and I’ll be in charge (to a certain extent). It’s big and scary but it feels exciting and that’s something I haven’t felt since I was teaching.Now the research and creating begins. I’ve already created myself a studio space in the basement after I swept away a ridiculous amount of dead spiders, bought myself some art supplies to start with, and have bought a few special art related things on Craigslist. The most important and useful thing I bought were two tickets to the Open Studios Tour. During the 2nd and 3rd weekends in October 100 Portland artists open their studios for the public to walk through. Tickets cost $15 and it’s been so worth it! I’ve already got contacts for framing, galleries, supplies, and some really awesome painting tricks, and that’s only from the first weekend. I was so inspired by all the creativity this weekend that today I made my first painting since college, and while it sucked (really it looks terrible) I’m still excited and optimistic about this adventure.This blog, along with my life, has changed directions. Instead of being centered on education it will be documenting my journey to become an artist. It will be a lot of creating, research, networking, and putting myself out there in ways I never have before. Hopefully soon when people ask me what I do I can call myself an artist without laughing or adding “kinda”. Here’s to starting over, peace!